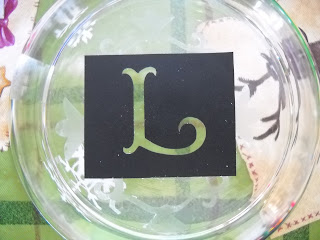
Ok, so I have to admit the etching is def. off set a little ( ok maybe a lot hehehehe! ), but I'm so happy that I figured this out on my own and just how easy it is... someone better start hiding all my glass bowls quickly! Wishing you all a very Happy New Year and may this new year only be better than the last! Can't wait to see you in the next year with more exciting crafts!
Happy Crafting!
Friday, December 31, 2010
Thursday, December 30, 2010
Back to the Basics Thank you design
This will be my first blog entry using my newest scraping member my Sizzix Texture Boutique! I already love it and I only have one plate for it ( but don't worry I'm on my way to getting more hehehe! ). I wanted to share some very simple 5 min. cards that are the same except for two small differences. One I used my Pebbles Chalking to add color to it, and the second one I used my I - Rock ( which let me tell you it really does rock for a glitter/glam fan like me!).
Both were done in a cream color and the Thank you Stamp is from My Pink Stamper! Have a fantastic and crafty day!
Lisa
Both were done in a cream color and the Thank you Stamp is from My Pink Stamper! Have a fantastic and crafty day!
Lisa
Wednesday, December 29, 2010
A Snowy Two Page Layout from 2009
Although the snow is slowly melting with the sun out here, I wanted to post one of my more simple but snowy two page layouts that I had done recently.
Like I said these pages were really simple: I used my corner rounder on the pictures and brackground paper. I popped up the snowy saying with pop up dots, and I added two simple glitter snowflake stickers one on each page. Viola!
Happy Crafting!
Lisa
Like I said these pages were really simple: I used my corner rounder on the pictures and brackground paper. I popped up the snowy saying with pop up dots, and I added two simple glitter snowflake stickers one on each page. Viola!
Happy Crafting!
Lisa
Tuesday, December 28, 2010
A Happy New Year Card with my New My Pink Stamper Stamps!
Hello everyone and I hope you all had a wonderful Christmas! Mine was def. a scrapbookfilled one and I'm super excited! I can't wait to start using all of my new products to make new crafts to share with all of you! While we were at my Mom in laws house over Christmas I just couldn't wait any longer to try some of my new stuff out so I made a quick little Happy New Years Card to share with you... enjoy!

Thank you all and I will be trying to post many more things for all of you soon!
Happy Crafting,
Lisa
Tuesday, December 21, 2010
A Christmas Advent Calender
I actually made 4 of these advent calenders for my mom and my aunts last year, and I meant to make one for myself this year but it's been a pretty busy holiday season in our household so there is always next year : ) . But I am just so proud of them, and since I didn't have a blog last year this is a newbe for everyone on here... I hope you enjoy!


All of the advent ornaments were cut with my Cricut using the Christmas Cheer Blog ( at that time I didn't have any other winter cartridges ). I used cardboard for the christmas tree calender part and covered it with 12 x 12 scrapbook paper that I traced and cut for each specific backing. Then my loving husband helped show me how to bend nails that I poked through the cardboard with a hammer, and to hide the nailheads i used a little bling with gems that already had adhesive on them!
Merry Christmas, and I hope to upload more and more on here next year!
Lisa
Thursday, December 9, 2010
Quick & Simple Candle Renovation
Hello everyone and Happy Holidays! Here is a quick little upload on how I took 2 candles that had dents all over them and made them look a little more "Holiday Perfect"!

Fast and Easy Directions: One roll of sticky double sided tape ( P.K. Glitz ), green martha stewart glitter, and white stickles for the top parts! See told ya it was easy, now I can have the yummy smell of these candles out, while adding a little Christmas Cheer!
Happy Crafting!
Lisa


