Showing posts with label die cutting. Show all posts

Friday, April 12, 2019

Little Letterboard Love

Hello friends!  It's Friday and that means I'm over on the Crafty Doodle Chick Blog today sharing my love for letterboards...


Hope to see you stop by and check it out!
Happy Crafting!
Lisa

Tuesday, August 14, 2018

Peace and Comfort

Hello friends!  Today you will find me over on the CAS-ual Friday Stamps Blog sharing a softer card made with one of my favorite color combos: Pink and Gold...


Full details on how this card came together can be found over on their blog, but before you go I have a special discount code to share with you...


Happy Crafting!
Lisa

Monday, May 21, 2018

Thinking of You with CAS-ual Friday Stamps

Hi!  It's Monday and today I am sharing a pretty floral card over on the CAS-ual Friday Stamps Blog.  Last week CAS-ual Fridays had a wonderful new release, and today I'm playing with the new Peaceful Garden Stamp Set and the Garden Fri-dies...


These stamps and dies have quickly become a favorite of mine as they are fun to mix and match with and so versatile!  To create today's card I started by stamping my sentiment in the middle of my cardbase, from there I was able to frame the sentiment in and dress it up with a beautiful mix of flowers and gems.  The paper I've used is from an older Fancy Pants Paper Pad that has a great variety of plain colored sheets as well as patterned sheets.


If you'd like to grab this stamp set or die set make sure you use my coupon code to save 15% off of your total purchase!


Happy Crafting!
Lisa

Sunday, May 6, 2018

Crafty Doodle Chick Challenge #3

Woot woot!  We are up to the third challenge hosted by Crafty Doodle Chick, and this one is all about the girls...


To create this card I started by layering various colored squares onto one 9 x 12 " Bristol Paper.  You can create a textured watercolor look with one color, by randomly layering the same color on top of each other and letting each layer dry before adding the next one.  Once I was satisfied with the look of each color I randomly die cut various layers from the Altenew 3D Rose Die Set.  While this set is currently sold out, there is another beautiful 3D Die set called Peony Dream.

Since, I had used bright colors for the flowers I knew I wanted to pop them against a black background but I didn't want the whole card front to be black.  Honestly I started out by spritzing the Altenew Leaf Burst Stencil with a Silver Mist onto a white panel to use as a background for my card. But while I was about to clean the reverse side of the stencil I decided to just smoosh it onto another card panel, and I loved the result of this so much more than my first panel so I went with it! :)


Thanks so much for stopping by and checking out what I've created for this challenge!  I hope you will take sometime to join us this month for your chance to win a $10 gc.

Happy Crafting!
Lisa

Saturday, March 24, 2018

Winnie & Walter: For the Love of Paper (Giveaway)

Hello!  It is Lisa here again with my 4th post this month, and this week I'm focusing on something we all love... Paper.  I'm titling this weeks theme: For the Love of Paper, and I'm going to show some fun ways to use up your paper especially patterned paper.  Let's get started.

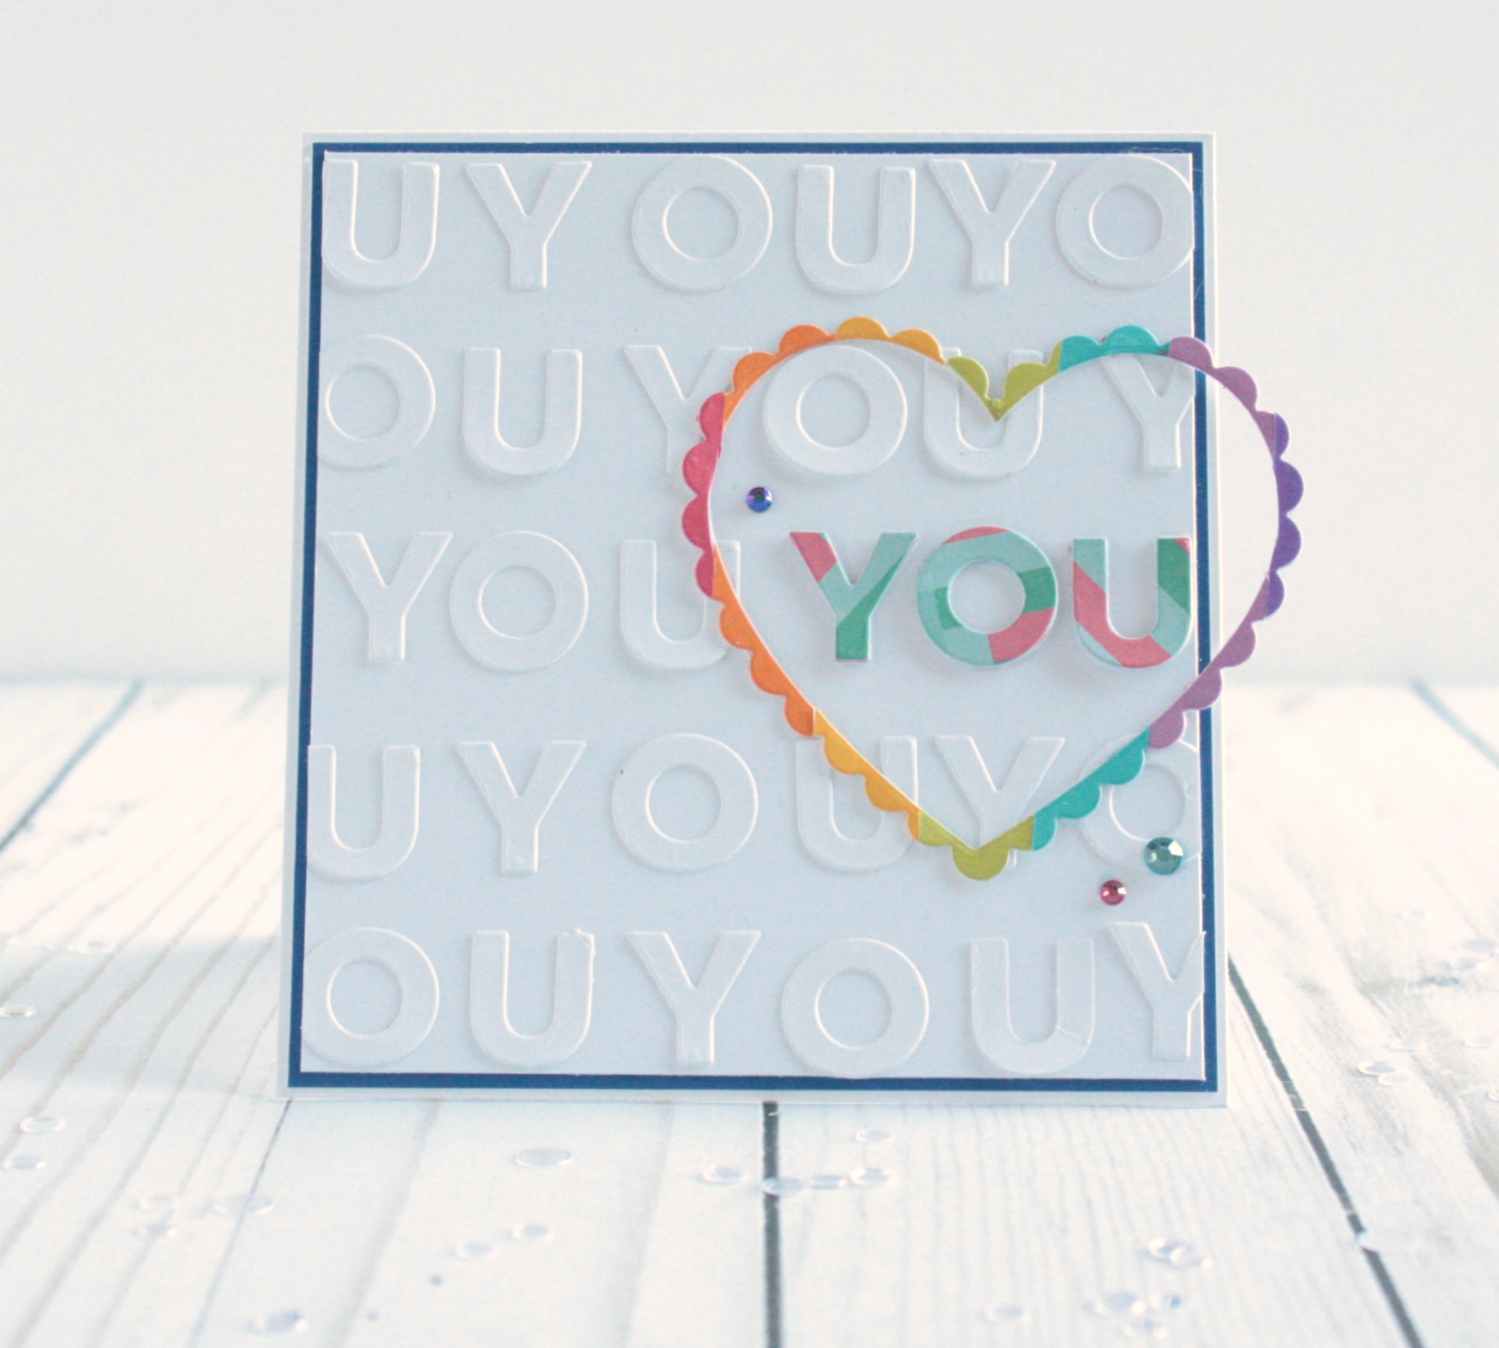
For my first project I'm using a scrap from a previous project last week (think rainbow heart) along with lots of diecutting the word You from the Dotty About You with Lydia Evans Cutaways...


I love the clean and simple look of this card and how just the one you is pops with color.  Now I know that the patterned paper I used on the "you" doesn't exactly match the rainbow heart scrap, but somehow it works.  By grounding the diecut panel with a thin border of navy blue cardstock, I find the colors quite complimentary.  Of course a few flat back gems didn't hurt as a final touch, hehehe!


This next project was actually something I've wanted to try for years, and just never think to try it.  I once saw a beautiful card in a magazine created by Miriam Prantner that showed heat embossing an image onto patterned paper with clear embossing powder.  Once it had set the paper was then covered with ink, and thanks to the resisting properties of embossing the patterned paper only peeks through the clear embossed images.  This technique was perfect to use with the Scenery: Seeing Hearts Stamp Set...


Tip: Once the ink is applied buff the embossed areas with a microfiber cloth to help the pattern underneath show through.  I finished this card off with a few more strips of patterned paper, using a border die from the Georgette Border Cutaways on the pink strip.  I also used the In A Phrase: Hugs & Kisses with Angelica Suarez Cutaways for a sentiment and hearts from the Essentials: Audrey Cutaways as embellishments.


My third card includes the technique Paper Piecing.  This was one of the first technique I really played with when I first started card making, and while I don't use it as often anymore I still love the look of it on my projects. (I might have to add it back to my arsenal soon)


I was inspired by the tennis ball image in the Dog-gone Cute with Evelin T Designs set, so I decided to re-create a larger tennis ball as my cardbase.  I then stamped the St. Bernard onto a brownish patterned paper and a white.  I cut out the parts I wanted to be white and adhered them to the brown image before fussy cutting the whole thing.  I did the same thing with the bowl and tennis ball, but with different colored paper.  Since I felt the image looked a little flat I added some shading with my Spectrum Noir Markers.


Finally, for my fourth card I decided to use lots of scrap patterned paper that I keep in a bag.  I really try to keep as many scraps as I can for future use, but sometimes my scrap pile can become a bit overwhelming in itself.  This project is a great scrap buster, and it looks so bright and cheerful with all of the different colors.


The Dotty About You with Lydia Evans Cutaways has some great funky circle cuts in various sizes so I used them all to create my own patterned frame.  I then adhered a few coordinating flat circle sequins for extra shine.  For the center of the card I chose a sentiment from the In Bloom: Ashlee's Rosie Posie with Lydia Evans Stamp Set.  The script on the word beautiful, is so pretty and well beautiful!  I also like that you can mix and match your sentiment from this set with the various options provided.


And there you have it Winnie & Walter fans, a slew of fun ways to use Patterned Paper.  From diecutting, to embossing, and paper piecing we've covered just a few techniques that paper lovers everywhere can rejoice while creating.  I hope I've given you some inspiration to dust off an old love, or try something new either way I encourage you to get your craft on!  And don't forget to leave a comment for a chance to win a $30 gc to the Winnie & Walter Store! Plus you can earn a bonus entry by liking and commenting any of my coordinating Instagram posts!

Happy Crafting!
Lisa

Saturday, March 17, 2018

Winnie & Walter Leading Lady: The Supporting Actress

Hello, hello!  I hope you are having an amazing start to your weekend, we are up in Cleveland visiting family and celebrating my youngest's Birthday with family.  But thanks to technology this post has been scheduled and set to go for a few days :).  Today my post is titled "The Supporting Actress".  So often we as cardmakers want to bring something to the front of a card that takes the spotlight, and really makes our projects shine.  But, what about that background that sometimes we work hard on and it just seems to fade away?  Or we spend so much time on our spotlight image, and we don't do anything with our background.

Now don't get me wrong, I LOVE cards like that and sometimes the background just isn't what we are wanting our recipients to pay much attention to, or we just want a clean and simple card that doesn't need a background.  For today, however, I wanted to shine the spotlight on the backgrounds of my cards and give them the lead. (You might want to get your sunglasses on too, lol)


Now you see why I mentioned sunglasses? lol  And I have to admit I might be a little obsessed with the script love die that comes in the In A Word: Love Coordinating Cutaways, as I've already used it three times this month.  For this fun rainbow card I started by cutting strips of DCWV Shimmer Cardstock and adhering them to a white panel. Next, I diecut the scalloped heart from the True Dotty Heart Cutaways from the center of my rainbow. I then diecut the regular heart from this same set out of the center of the scalloped heart that I had cut out.  This sounds more confusing than it actually is... really it's just diecutting the center of a diecut (does that sound any less confusing?).  This left me with a negative scalloped cut in my rainbow strips, then I filled it in with the regular heart cut.  Maybe this should be called inlaid diecutting within a negative cut... or something like that.  Any who, I love the results!  I finished it off my diecutting the xoxo strip along the bottom and keeping it intact, and adding the script love die across my hearts.  The rainbow background though, is definitely the star of it all.

For my next card I used diecutting again to help my background shine.  This time I created my own paper lace of sorts by diecutting the same floral strip from the Georgette Border Cutaways repeatedly.


I wanted the design to really pop, so I chose contrasting colors to really draw the eyes in.  Since I was going for a more natural look I didn't measure my cuts out, and rather just moved it around to from strip to strip.  I then added the In a Word: Happy Cutaway that was sprinkled with glitter, and I finished the card with a few rhinestones.  By keeping the sentiment simple, and using clear rhinestones I was able to keep the focus on the lacy background.


For my final project I've used stamping to create a fun and eclectic background with the Dotty About You with Lydia Evans Set...


By randomly stamping the various images in this set in different colors you could create an entire set of cards.  Vellum also comes in handy with this card as it allows the background to be seen behind the sentiment.  I also added a few hand drawn wavy lines to frame the stamped panel in and to keep the eyes moving inward.

I hope that today's post has inspired you to maybe take a second look at your backgrounds, and maybe make them the star of an upcoming project.  After all the supporting actress/actor can really make a scene shine that much brighter.  Thanks so much for stopping by, and I hope to see you over on my blog as well!

Happy Crafting!
Lisa

Tuesday, January 30, 2018

You're Wonderful

Hello!!!  Today I am over on the CAS-ual Fridays Blog sharing a sweet card that would be perfect for a friend or a loved one...


For full details on how this card came together please stop by their blog and check it out!  But before you go I have a code for you to use so you can spoil yourself in the store too!


Code: LISASENTME


Happy Crafting!
Lisa

Friday, December 1, 2017

A Muse Studio Release Day!!!

Hi!  I'm popping back in to let you know that today is release day for A Muse Studio!!!!  That means all of the new goodies are now available for you to get your creative groove on!  Here are a few more projects I've created with this new release...


Supplies Used:
Ugly Sweater Card: Cardstock: Apple, Reverse Polkadot Apple, Sugar; Stamp Set: You're the Coolest, Ugly and Bright; Die Sets: You're the Coolest, and Ugly and Bright; Ink: Momento - Tuxedo Black, A Muse Studio Pigment Ink - Grass, Cocoa, and Bermuda; Spectrum Noir Markers
Happy WinterCard: Cardstock: Sugar, Bermuda; Stamp Set: You're the Coolest, Peppermint Swirl; Die: Snowflake Trio; Glitter: Diamond; Gold Embossing Powder; Ink: Memento Tuxedo Black

Thanks so much for stopping by today and Happy Shopping!
Lisa

Wednesday, October 11, 2017

Going Floral with Altenew on MarkerPOP

Hi!  I'm back on the MarkerPOP Blog today and I'm sharing all things Altenew...


I hope you will get a chance to hop over and check out my full post and photos.  Plus learn more about the MarkerPOP Video Challenge and how you can win a $50 gc!  Odds are super high at this point too!

Happy Crafting!
Lisa

Monday, August 14, 2017

Crafters Companion on HSN Aug.16th!

Hello!!!  I hope you are having a nice weekend so far!  Did you know on Wednesday August 16th it's going to be another crafting party with Crafters Companion on HSN?! YAY!!!  And this time it is all about Christmas and Watercoloring... literally two of my most favorite things!  I thought I would pop in and share one of my projects using some of the new Christmas Create A Card Dies...  These things are genius!  You receive such a beautiful result by simply diecutting the front of your cards.  Check it out...


I just couldn't resist making a trio of cards with this Christmas Eve Create a Card Die and a mix of Crafters Companion Luxury Cardstocks.  For the edges I've used a Gold Gilding Wax, which will also be available on HSN!  I'm obsessed with the stuff I tell ya!


And make sure you join in the fun, inspiration and giveaways by checking out our Facebook Party!

Happy Crafting!
Lisa

Sunday, July 2, 2017

Crafters Companion July 11th HSN Sneak Peek...

Woo hoo!  I'm popping in on this gorgeous Sunday morning to share a sneak peek at some more of the new goodies that will be available on HSN on July 11th!  If you would like to see a complete list of the products you can click this link.  Now onto my sneak peek...


Aren't these flowers gorgeous?!  These flowers are made with the new Quilling dies that will be available on HSN July 11th, and I LOVE them!  I have also used the Quilling paper pack that will also be available for purchase, and that work so beautifully with these dies.  To get nice full flowers I would recommend die cutting 3 of each type of flower, layer them together with strips of double sided adhesive along their bottom edge making sure to stagger the petals, and then you simply roll them inward to form the flower.  I do recommend using a liquid glue or hot glue gun on the edge to ensure that your flower will stayed rolled up.  You can also watch Sara's video on the Crafters Companion Facebook page on how she creates her flowers with this die.  Optional: I also added beads to the middle of mine by stringing the beads through floral wire and running the ends through the middle of my flowers.

Finally, I thought I would share a few of the projects that I've created with some of these flowers...


Aren't they so much fun?!  I can't wait to see what you'll make with yours!  And don't forget to join the Facebook party for our HSN July 11th release, it's always full of fun inspiration and giveaway! Woot woot!

Happy Crafting!
Lisa

Wednesday, June 21, 2017

Get Your Twinkle On...

This is post #1 for the day and I'm sharing a fun and super sparkly card today on the CAS-ual Friday's Blog, woot woot!


Full details on how this card came together can be found on their blog, so I hope you'll get a chance to check it out!  And before you go I have a discount code for you...


Michele also has 29 sets that are retiring, including the Twinkle Set that I've used on this card.  So get yours before they are gone forever!


Happy Crafting/Shopping!
Lisa

Thursday, June 15, 2017

STAMPlorations CAS Challenge Reminder

Hello!  It's been quiet on the blog lately, so sorry about that!  Life has been busy, and don't worry I've been getting crafty but it's all with hush hush projects that I can't share yet... but don't worry I'll be sharing soon enough!  Any who, today is when we remind you to join the June STAMPlorations CAS Challenge.  This challenge will be taking a break over the summer months and resume in October, so I hope you will be able to squeeze this one in before that happens.  All products are welcome!  With that said here is my take on the CAS Challenge (the twist is to use masculine colors)...


To create this card I've used a mix of their Artplorations, CUTplorations and STAMPlorations, woot woot!  More specifically I used: STAMPlorations Power of Words, CUTplorations Tag Builder, ARTplorations Weathered Wood.  


I know there are lots of new goodies hitting the store every day and I have a great discount code for you to use to save 20% off your total purchase! YAY!

Use Code: STAMPGIRLLISA

Happy Crafting/Shopping!
Lisa

Wednesday, March 22, 2017

Ombre Coloring on Die Cuts

Hi!  Today I have a fun tutorial up on the MarkerPOP Blog and I hope you'll stop by to check it out!  Here is a sneak peek...


Also don't forget to enter the HUGE giveaway going on there too!
Happy Crafting!
Lisa

Wednesday, August 24, 2016

Planner Tags with CutCardStock.com

Hello!  Today you will find a fun DIY tutorial that I've created on how to make your own Watercolored Planner Tags on the www.CutCardStock.com Blog!  Woot woot!  I'll share a peek, but you need to head over to their blog to see the full how to, and make sure you leave a little hello so I can leave you some love back!


Thanks for swinging by and Happy Crafting!
Lisa

Monday, August 8, 2016

Love ya CAS-ual Fridays Stamps!

Happy Monday!  My family and I are just now getting home from vacation, so I bet we are snuggled up in bed snoozing away at the moment.  However, the magical world of scheduling blog posts can be a life saver sometimes hehehe!  So right now you will find me here and on the CAS-ual Fridays Blog sharing a fun card I've created with lots of Fri-dies...


I wanted to create the look of a cover plate background and I had fun doing just that with the lovely links die and patterned paper.  To help the patterned paper stand out I adhered it to a bright background.  For the sentiment I ran it through 4 times layering it up, and added a touch of silver accents to just the lower half of it.  Since I had die cut the sentiment in white I added a black pennant for it to really pop.  Finally I had some die cut CASual trees from a previous project and I knew they would be perfect to tuck in behind the sentiment.


Thanks so much for stopping by today and Happy Crafting!
Lisa

Saturday, July 2, 2016

Winnie & Walter and Ellen Hutson Share the Love Day 5

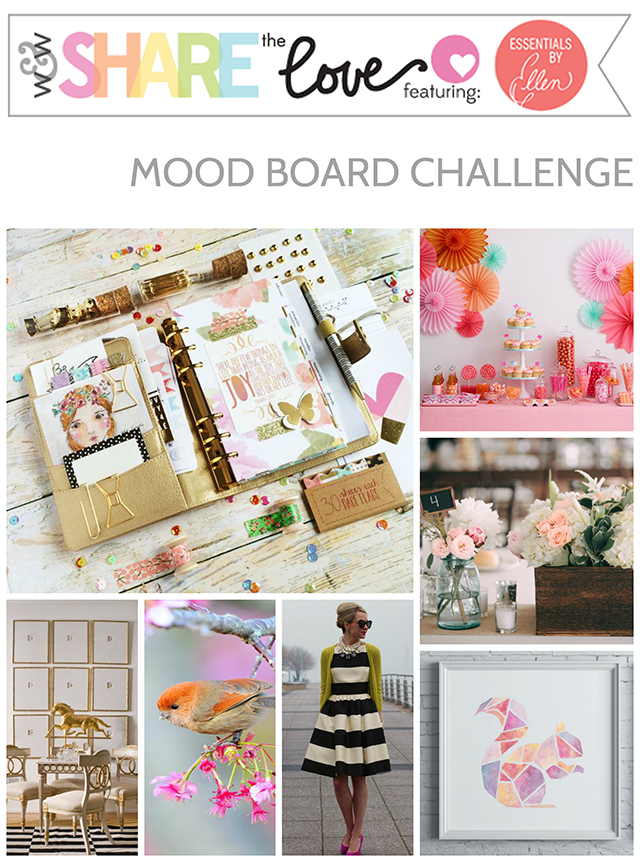
Hello!  I am back!  Now I am sharing my Winnie & Walter with Ellen Hutson Share the Love Day 5 creation with you.  We were to use the gorgeous mood board seen below for inspiration...


I was immediately drawn to the mix of pinks in several photos as well as the pop of gold and florals.  So here is what I created...


This card is a happy mix of Essentials by Ellen Bold Blossom Dies and the Winnie & Walter Happy die and smaller die pieces from the Audrey's Cutaways.  I used a happy mix of the Happy Day Stack by DCWV and some gold glittered card stock.

I am also linking this up to the Simon Says Stamp: Anything Goes

Thanks so much for visiting and Happy Crafting!
Lisa

Friday, April 24, 2015

Pearls... the perfect touch

Hi!  Today you will find this CAS card up on The SweetStamps.com Blog.  This card has lots of beautiful white space and some fun stamping/die-cutting that shine with a touch of pearl accents...


Supplies:
ATC Backgrounds #3 Clear Stamp Set AF4809
 Swirly Doodle Butterflies Clear Stamp Set AF4602
 Distress INK PAD MINIS
Self-Adhesive Pearls PEARL
 Flutterby #2 SweetCuts Die set of 2 sc012b

I am entering this in the Less Is More Challenge: Up Up and Away
and in the Simon Says Stamp Challenge: Clean and Simple

Thanks so much for stopping by and I hope you have a wonderful weekend!
Happy Crafting!
Lisa

 
BLOGGER TEMPLATE BY DESIGNER BLOGS