Showing posts with label Winnie & Walter. Show all posts

Sunday, April 15, 2018

Winnie & Walter Winner

Hello, hello!  I'm popping in today to share my winner from my Winnie and Walter Leading Lady Posts.    I also want to take a moment to thank all of those who have taken the time to leave such kind and thoughtful comments throughout my posts.  It meant so much to me, and every time I saw a new comment I was happy dancing! :)  You all are amazing!!!


Drum rolls please....

Sue D said...
Fabulous cards. Love how you used cork, wood veneer and craft metal.
slrdowney at hotmail dot com

Congratulations Sue!  Please contact me at lisascreativeniche@gmail.com  with your name and the email address you would like your gift certificate sent to.

Thank you all again and have a wonderful week!
Happy Crafting!
Lisa

Saturday, March 31, 2018

Winnie & Walter Leading Lady: Make New Friends but Keep the Old

Do you remember that song that others might have sang to you as a child? Make new friends, but keep the old, one is silver and the other is gold.  I have to admit that I sing it to my children occasionally, and it always makes us smile.  It's a wonderful reminder to us that while new things are fun and exciting, older things should not be tossed aside as they may still be reliable, trusted and cherished.  I feel this can be applied to crafting as well.  There are always so many wonderful new products that we can't wait to get our hands on (and for good reason to!), but we shouldn't forget about those oldies but goodies, and it's fun to mix the two.  So for my final post as Leading Lady I'm going to share a few ways I mixed so many great new products with some of my older stained and loved Winnie and Walter goodies.

My first project is also a case(ing) of one of my older projects.  I love the look of inlaid die cutting, and the Mini Scenery: Bed of Roses Stamp Set is the perfect to set to die cut sentiments into...


For this new version of the card I decided to also use a spotlight technique, and colored in the outer parts of the die cut word with bright colors and I kept the sentiment (from the In a Word: Cuddles Cutaway)  monotone with grey.


I think this helps the sentiment stand out a little more, and it also draws the eye in.  I also used the Essentials: Lana Cutaway to frame the panel.  And here's a look at the project I had case(d) this card from just so you can compare the two.


My second project(s) are mini in size, but pack a cute punch...


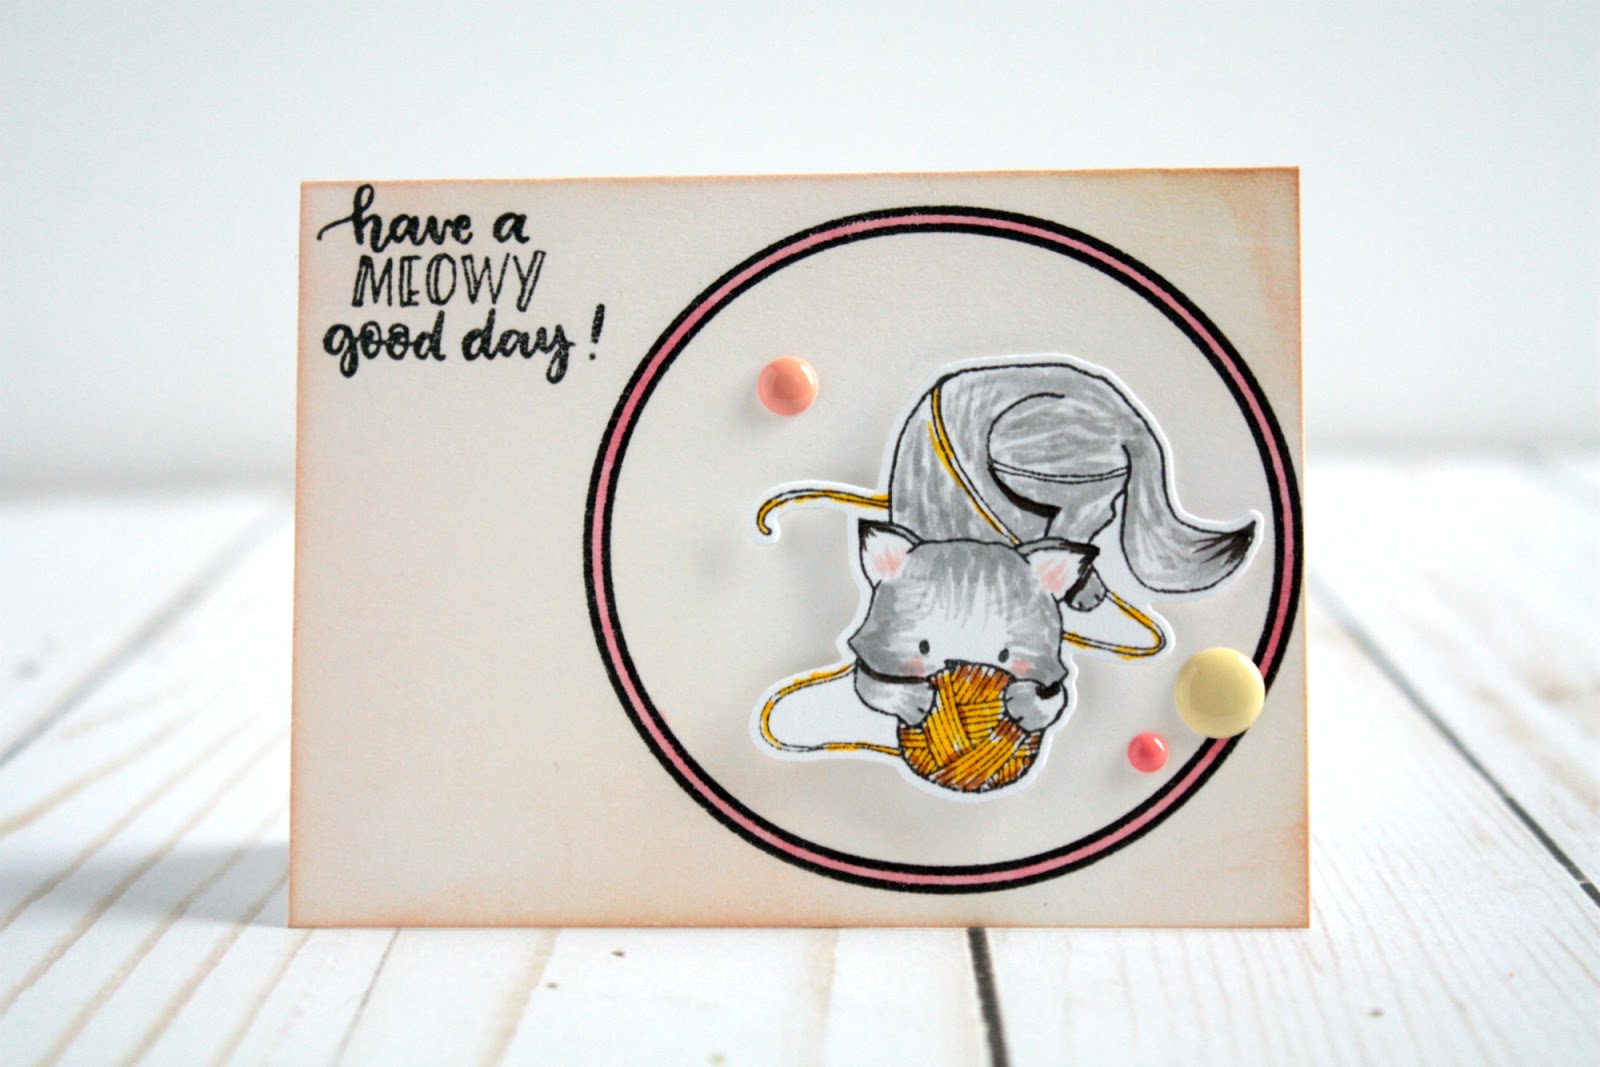
Every day I send notes in my kids' lunch bags.  Sometimes they are just to send a smile, to build them up if I know they've hit a rough patch, or to let them know I'm thinking of them.  These mini cards are the perfect size to do just that!  For these cards I've mixed the older Ring in the Celebration Stamp Set with the newer Dog-gone Cute with Evelin T Designs Stamp and Cutaways and the Purrfect with Evelin T Designs Stamp and Cutaways.


To color these fur babies in I used my Zig Clean Color Real Brush Markers, and I was so excited on how the fur turned out.  I normally have a hard time achieving a fur look on my animals, but the thin brush tip on these markers made it super easy.  The rest of the cards were colored with Distress Ink, and a few enamel dots on each finished them off.

This next project shows off another super cute kitty from the Purrfect with Evelin T Designs Stamp and Cutaways in a fun way...


I've used the older True Multifaceted Star Cutaway as a play toy for this cute kitty.  And I finished the card off with a sentiment and stars from the Wishing You with Evelin T Designs Set.


For my final project I've taken it off the page and I wanted to share a sweet wooden tag/ornament that is sure to please the recipient or to brighten any spot in your own home...


In one of my earlier posts this month I showed coloring on wood veneer, not I'm showing stamping and coloring onto a wood slice!  Colored pencils are the key to these adorable tags.  I actually created some of these a few weeks ago using the LS Exclusives: So Tweet with Evelin T Designs Stamp Set and added them onto gift bags.  It was like giving a gift on a gift!  For the above example I used a sentiment from the In a Word: Love Stamp Set and regular Dye Ink.


And there you have it!  My final project as a leading lady for the month of March.  I can not thank Shay enough for having me, and letting me share some of my projects with all of you.  And thank you to all who have come to visit, check my projects out, and have left such kind words for me.
And don't forget to leave a comment on todays post for a last entry into my giveaway.


And if you leave comments on any cooresponding instagram posts you will get an extra entry! :)
And as my title to this post indicated I hope I've made some new friends and delighted some old friends along the way.  
Happy Crafting!
Lisa

Saturday, March 24, 2018

Winnie & Walter: For the Love of Paper (Giveaway)

Hello!  It is Lisa here again with my 4th post this month, and this week I'm focusing on something we all love... Paper.  I'm titling this weeks theme: For the Love of Paper, and I'm going to show some fun ways to use up your paper especially patterned paper.  Let's get started.

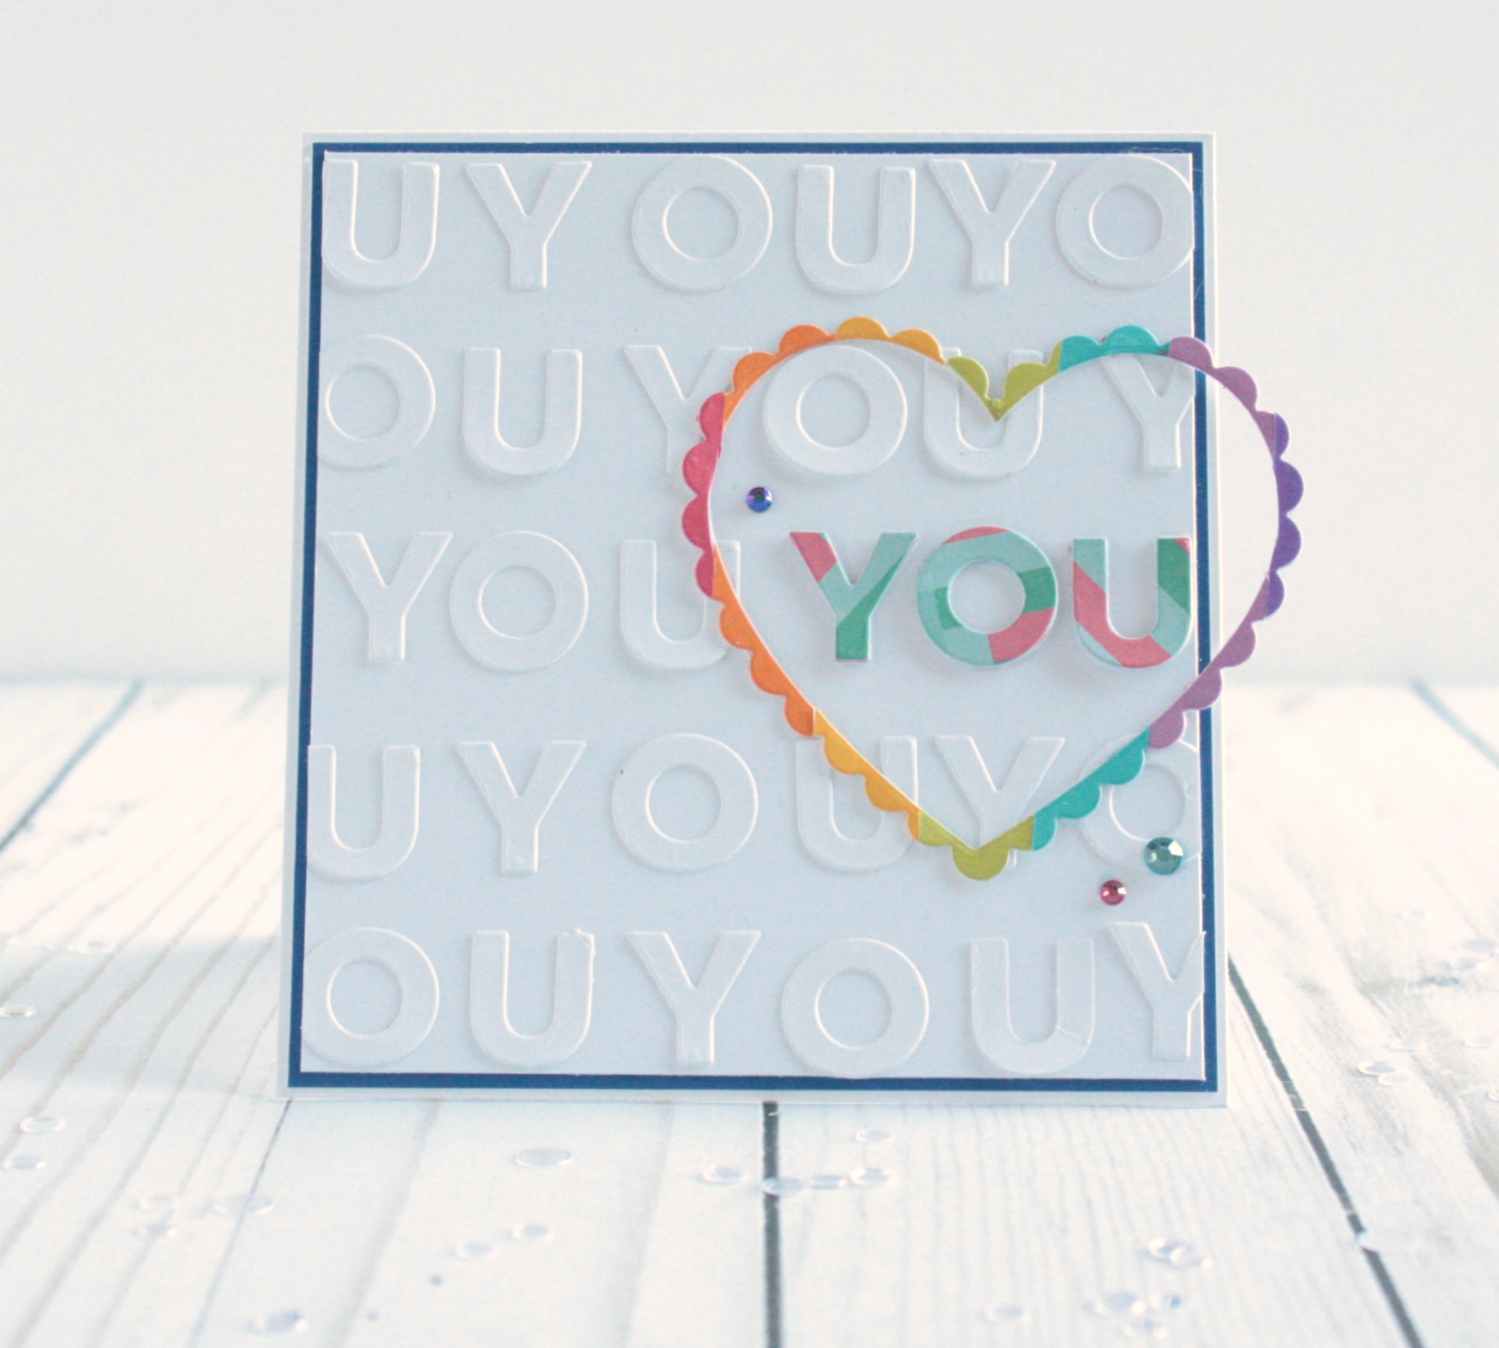
For my first project I'm using a scrap from a previous project last week (think rainbow heart) along with lots of diecutting the word You from the Dotty About You with Lydia Evans Cutaways...


I love the clean and simple look of this card and how just the one you is pops with color.  Now I know that the patterned paper I used on the "you" doesn't exactly match the rainbow heart scrap, but somehow it works.  By grounding the diecut panel with a thin border of navy blue cardstock, I find the colors quite complimentary.  Of course a few flat back gems didn't hurt as a final touch, hehehe!


This next project was actually something I've wanted to try for years, and just never think to try it.  I once saw a beautiful card in a magazine created by Miriam Prantner that showed heat embossing an image onto patterned paper with clear embossing powder.  Once it had set the paper was then covered with ink, and thanks to the resisting properties of embossing the patterned paper only peeks through the clear embossed images.  This technique was perfect to use with the Scenery: Seeing Hearts Stamp Set...


Tip: Once the ink is applied buff the embossed areas with a microfiber cloth to help the pattern underneath show through.  I finished this card off with a few more strips of patterned paper, using a border die from the Georgette Border Cutaways on the pink strip.  I also used the In A Phrase: Hugs & Kisses with Angelica Suarez Cutaways for a sentiment and hearts from the Essentials: Audrey Cutaways as embellishments.


My third card includes the technique Paper Piecing.  This was one of the first technique I really played with when I first started card making, and while I don't use it as often anymore I still love the look of it on my projects. (I might have to add it back to my arsenal soon)


I was inspired by the tennis ball image in the Dog-gone Cute with Evelin T Designs set, so I decided to re-create a larger tennis ball as my cardbase.  I then stamped the St. Bernard onto a brownish patterned paper and a white.  I cut out the parts I wanted to be white and adhered them to the brown image before fussy cutting the whole thing.  I did the same thing with the bowl and tennis ball, but with different colored paper.  Since I felt the image looked a little flat I added some shading with my Spectrum Noir Markers.


Finally, for my fourth card I decided to use lots of scrap patterned paper that I keep in a bag.  I really try to keep as many scraps as I can for future use, but sometimes my scrap pile can become a bit overwhelming in itself.  This project is a great scrap buster, and it looks so bright and cheerful with all of the different colors.


The Dotty About You with Lydia Evans Cutaways has some great funky circle cuts in various sizes so I used them all to create my own patterned frame.  I then adhered a few coordinating flat circle sequins for extra shine.  For the center of the card I chose a sentiment from the In Bloom: Ashlee's Rosie Posie with Lydia Evans Stamp Set.  The script on the word beautiful, is so pretty and well beautiful!  I also like that you can mix and match your sentiment from this set with the various options provided.


And there you have it Winnie & Walter fans, a slew of fun ways to use Patterned Paper.  From diecutting, to embossing, and paper piecing we've covered just a few techniques that paper lovers everywhere can rejoice while creating.  I hope I've given you some inspiration to dust off an old love, or try something new either way I encourage you to get your craft on!  And don't forget to leave a comment for a chance to win a $30 gc to the Winnie & Walter Store! Plus you can earn a bonus entry by liking and commenting any of my coordinating Instagram posts!

Happy Crafting!
Lisa

Saturday, March 17, 2018

Winnie & Walter Leading Lady: The Supporting Actress

Hello, hello!  I hope you are having an amazing start to your weekend, we are up in Cleveland visiting family and celebrating my youngest's Birthday with family.  But thanks to technology this post has been scheduled and set to go for a few days :).  Today my post is titled "The Supporting Actress".  So often we as cardmakers want to bring something to the front of a card that takes the spotlight, and really makes our projects shine.  But, what about that background that sometimes we work hard on and it just seems to fade away?  Or we spend so much time on our spotlight image, and we don't do anything with our background.

Now don't get me wrong, I LOVE cards like that and sometimes the background just isn't what we are wanting our recipients to pay much attention to, or we just want a clean and simple card that doesn't need a background.  For today, however, I wanted to shine the spotlight on the backgrounds of my cards and give them the lead. (You might want to get your sunglasses on too, lol)


Now you see why I mentioned sunglasses? lol  And I have to admit I might be a little obsessed with the script love die that comes in the In A Word: Love Coordinating Cutaways, as I've already used it three times this month.  For this fun rainbow card I started by cutting strips of DCWV Shimmer Cardstock and adhering them to a white panel. Next, I diecut the scalloped heart from the True Dotty Heart Cutaways from the center of my rainbow. I then diecut the regular heart from this same set out of the center of the scalloped heart that I had cut out.  This sounds more confusing than it actually is... really it's just diecutting the center of a diecut (does that sound any less confusing?).  This left me with a negative scalloped cut in my rainbow strips, then I filled it in with the regular heart cut.  Maybe this should be called inlaid diecutting within a negative cut... or something like that.  Any who, I love the results!  I finished it off my diecutting the xoxo strip along the bottom and keeping it intact, and adding the script love die across my hearts.  The rainbow background though, is definitely the star of it all.

For my next card I used diecutting again to help my background shine.  This time I created my own paper lace of sorts by diecutting the same floral strip from the Georgette Border Cutaways repeatedly.


I wanted the design to really pop, so I chose contrasting colors to really draw the eyes in.  Since I was going for a more natural look I didn't measure my cuts out, and rather just moved it around to from strip to strip.  I then added the In a Word: Happy Cutaway that was sprinkled with glitter, and I finished the card with a few rhinestones.  By keeping the sentiment simple, and using clear rhinestones I was able to keep the focus on the lacy background.


For my final project I've used stamping to create a fun and eclectic background with the Dotty About You with Lydia Evans Set...


By randomly stamping the various images in this set in different colors you could create an entire set of cards.  Vellum also comes in handy with this card as it allows the background to be seen behind the sentiment.  I also added a few hand drawn wavy lines to frame the stamped panel in and to keep the eyes moving inward.

I hope that today's post has inspired you to maybe take a second look at your backgrounds, and maybe make them the star of an upcoming project.  After all the supporting actress/actor can really make a scene shine that much brighter.  Thanks so much for stopping by, and I hope to see you over on my blog as well!

Happy Crafting!
Lisa

Saturday, March 10, 2018

Winnie & Walter Spotlight #2

Hello!  I am so happy to be back with all of you again!  If you were able to catch my first Winnie & Walter Leading Lady post here, then you might remember that I am planning on having a theme for each of my posts through the month of March.  Today's post I am titling "Off the Page",  and I am going to focus on various mediums you can stamp on besides paper.  Don't get me wrong I love paper, and my collection can totally attest to that (as can my husband! lol), but there are lots of mediums out there that give beautiful and unique results that you may not have considered using.

For my first off the page project I'm going to share stamping on cork.  This tends to be a more common medium when stamping, and with good reason as it is easy to come by, gives great results, and adds fun texture...


 For this card I stamped this coffee cup and steam from the Warm Wishes to You Stamp Set right onto a piece of adhesive backed cork.  I then die cut both with the coordinating Cutaways.  I then added this onto a few sheets of patterned paper.  As a final touch I added glossy accents to represent the liquid in the cup, and I love the touch of shine too!


For the next medium I chose to work with adhesive Wood Veneer.  I love the look of wood and woodgrains on projects, and so I decided to see what else this medium had to offer in two very unique ways.  First, I wanted to stamp so sweet little critters and color them in. Here is what I came up with...


Isn't she too much fun?!  This image comes from the Purrfect with Evelin T Designs, and I've used the matching Cutaways too.  My cat is always trying to fit in the smallest boxes, or game boxes when we have them out, it's just too funny!  Now I knew I wanted to color my images in, but I also knew that wood soaks and spreads with the touch of inks so markers were out.  The same went for watercolors, obviously they would spread as well and I wanted a nice clean image.  That's when I looked over and saw my Spectrum Noir Blendable Pencils, and I have to say I'm hooked!  I was surprised at how easy it was to blend my colors as well.  After creating this card I already have all kinds of plans on coloring in some of those larger floral images onto this Wood Veneer, doesn't that just sound lovely?

As I stated before I knew that inks would spread easily on the Wood Veneer so I wanted to give it a little test.  Alcohol inks are all the rage right now, so I thought why not start there?  And friends I LOVE it!  They blend and spread like butter...


 For this card I started by blending purple and pink alcohol ink colors over an entire piece of Wood Veneer.  Since the ink dries quickly I was able to die cut my hearts from the True Dotty Heart Cutaways right away.  And of course I had to fill all of those little dots with a fun mix of flat back gems.  While these were drying, I created my background panel by stamping various sentiments from the Sentimental Love Stamp Set.  And viola!

I have one final card for today that mixes the Wood Veneer with a new medium: Craft Metal.  I have used Craft Metal before to emboss and die cut with, but I had never tried stamping on it so I gave it a go... and it worked!


I wanted to color my stamped flowers in with Alcohol Markers so I used a Alcohol friendly ink and set it to dry for a bit before working with it.  If I were to stamp onto this Craft Metal and try to color on it right away it would do nothing but smear the images.  I also heat set the images just to make sure they were fully dry (make sure you use tweezers or something besides your hand to hold it when you are heating it up, or the metal may burn your hands).    While you may not be able to layer your coloring on Craft Metal or blend colors, it will give you a watercolor look as the coloring dried, and I love it!  For this card I used the In Bloom: Ashlee's Rosie Posies with Lydia Evans, and it's coordinating cutaways, as well as left over Wood Veneer heart from the True Dotty Heart Cutaways.  I then finished it off with the Hugs and Kisses Cutaway layered in black and silver.

Whew!  And there you have it!  Lots of ways for you to go off the page with your crafting.  Do you have a favorite medium other than paper to work with?  Thanks so much for stopping by today, the amazingly sweet Shay is letting me do a $30 giveaway to one of my readers! Yay!!!  So leave a comment below telling me something you enjoy stamping on besides paper and you'll be entered to win.  Also, if you would like to follow me on my Instagram page, or if you already do leave me a little love to the corresponding Instagram picture and I'll give you an extra entry! :)
Happy Crafting!
Lisa

Saturday, March 3, 2018

Emboss-abilities With Winnie & Walter (Giveaway too!)

EEEEKKK!!!!  I can not believe I am Guest Designing for the whole month of March,  on the Winnie & Walter Blog!  This is a dream come true, and I am so very grateful to Shay for this amazing opportunity.  For my posts throughout the month I've decided to go with five various themes, with the hope of inspiring you and maybe even showing you something new so that you can get your Winnie & Walter goodies out and loved! 

Today's theme is titled Emboss-abilities, and I have three specific forms of embossing to share with all of you.  The first being the most typical method of embossing: Heat Embossing.  This technique never get's old when you get to watch the magic of your image coming to life as the embossing powder melts.


For this first card I've used the For Luck Stamp Set (this set will be available soon for purchase!), and I've heat embossed the three clovers within the set.  While the smaller two clovers are embossed with Gold Embossing Powder, I chose to give the largest clover a little more interest by embossing the top in Gold and the bottom half in Rose Gold.  I also chose to emboss these clovers onto vellum rather than plain cardstock.  I knew that I would be popping these up on patterned cardstock, so the vellum was perfect for allowing the patterned paper behind it to look softer around the clover.  I also chose to emboss my sentiment strip edges with gold embossing powder by rubbing the edges with my Versamark ink pad.  Finally, I cut my background panel with the Essentials: Lana Cutaways, adhered my clover, and added a few Metallic Gold Cupped Sequins.


The second type of Embossing that I wanted to share with all of you is Embossing Paste.  Embossing paste comes in lots of various forms, including with glitter as I have used here.  This specific Embossing Paste is called Glimmer Paste by Nuvo and this stuff sure shines! (I swear you're going to think I'm a Raccoon by the end of this post with all this glitz! And you might not be wrong lol)


I really love how this card turned out.  First, I needed something to run my embossing paste over so I created my own temporary stencil of sorts by using the negative of the large Love cut from the In a Word: Love Coordinating Cutaways and masking paper.  Once my mask was cut, I covered 3/4's of the word with Tanzanite Lavender and the top most part with Golden Crystal pastes.  After I had applied both colors I then removed the masking paper to reveal my embossed word.  You do not want to wait long to remove the paper as you will run the risk of the paper sticking to the paste and not giving you the crisp lines.  Another tip is to make sure your masking paper is pressed firmly onto your background, so that no paste can get under the paper.

Various embossing pastes have different drying times.  While mine was drying I worked on the rest of my card.  I wanted to layer my sentiment, so I chose the thin script love sentiment in this set and die cut it with Gold Cardstock.  I then stamped, heat embossed, and cut some floral images from the In Bloom: Ashlee's Rosie Posies with Lydia Evans and with it's coordinating dies.  I love the whimsical look of the flowers in this set, and I went with complimentary colors.  Once everything was dry I cut the panel from the Essentials: Audrey Cutaways.


For my final card today I chose to Dry Emboss the main sentiment using the In a Phrase: Hugs & Kisses with Angelica Suarez Cutaway.  Now, I know that this almost looks like it has been in-laid rather than embossed, but I promise you it wasn't I simply used the deep emboss technique with my Gemini rather than the lighter one. You can also tell it is embossed by the impression of the dies outter edge lines.


I love the dry embossing technique as it gives your dies one more way to be used!  Along with the hugs & kisses sentiment I also chose to dry emboss some hearts from the Essentials: Audrey Cutaways, and a small border die from the Georgette Border Cutaways.  I then stamped a few words from the Sentimental: Love Stamp Set in a contrasting black ink, and adhered my panel onto some patterned paper.  Next, I stamped, colored and die cut that sweet little pup from the Dog-gone Cute with Evelin T Designs and it's coordinating cutaway set.  For a finishing touch I added a few sequins.


Thank you so much for stopping by today for my first post as a Winnie & Walter Guest Designer!  I hope I've inspired you to get crafty, try something new, or pull out an old trick.  I would love for you to stop by my blog, Lisa's Creative Niche,  for a chance to win a $30 gift card so generously donated by Shay to the Winnie & Walter Store.


Happy Crafting!
Lisa

Wednesday, July 26, 2017

Dancing Animals with MarkerPOP

Hello!  Today I am up on the MarkerPOP Blog to share a fun little party card, and I hope you'll get to stop by and see all of it by hopping over there!


Thanks so much and Happy Crafting!
Lisa

Wednesday, July 19, 2017

Dancing On the MarkerPOP Blog + Giveaway Details

Today I'm up on the MarkerPOP Blog sharing this cute little party animal from the new Winnie and Walter Happy Dance Set and new Concord and 9th Sunshine Turnabout...


Don't forget if you stop by to leave a comment to be entered to win a $10 gc! woot woot!  And join in our challenges for an awesome prize box (I'm pretty jealous!).  That's not all!  There is also a Creative Giveaway you don't want to miss!

Happy Crafting!
Lisa

Sunday, July 16, 2017

MarkerPOP Challenge #125

Hello!  I hope you are having a nice weekend!  So far the weather has been gorgeous here in Ohio.  I'm popping untidy to share the new challenge happening on the MarkerPOP Blog.  These challenges are always fun and easy to join along as all you have to do is use some type of marker that is carried in their store!  Super simple!  Plus you can win awesome prizes!  Any who, here is the newest inspirational photo and what I've created based on it...


I instantly thought of going to a fair of some type and busted out my Mama Elephant Little Dog Agenda Stamp Set to create my own fair like scene...


To color in my scene I used a mix of Distress Markers, water, and a brush.   I had used a Copic drawing pen to create my little tight rope, but in hindsight I should have added it after I watercolored. duh!


I also used the new Winnie and Walter Stamp Set: Sentimental Birthday for my sentiment.  Thanks so much for stopping by today and I can't wait to see what you'll create for this challenge!
Happy Crafting!
Lisa

Thursday, May 4, 2017

In-laid DieCutting on MarkerPOP Blog

Hello!  Today I am over on the MarkerPOP Blog and I'm sharing a fun card that focuses on the inlaid diecutting technique...


I hope you'll stop by and check out my full post and photos! I had a blast coloring this in with the Spectrum Noir Illustrator Markers.

Happy Crafting!
Lisa

Sunday, March 12, 2017

MarkerPOP Challenge: Lucky in Love

Hi!  I hope you are having a nice weekend so far!  This weekend has been a lot of fun as we have been celebrating my youngest's Birthday with her friends at her Gymnastics Training Center.  So I'm popping in early this Sunday morning to share my take on the new MarkerPOP Challenge...


And here is what I've created...


 To create this card I started by stamping the sweet Rainbow Lucy Image from CC Designs and colored her in with various Copic® Markers.  After I cut her out I set her to the side.  I then created my marbled background using my Gansai Tambi Watercolors.  Once this had dried I cut the panel out with a Winnie and Walter die.  Next I stamped my sentiment created from a mix of Winnie and Walter The Big The Bold and The Happy with The Big The Bold and The Extras.  I then layered it all up on my cardbase and finished it with some Pretty Pink Posh Sequins.

Don't forget about the huge giveaway going on over on the MarkerPOP Blog, and can't wait to see what has inspired you for this challenge!
Happy Crafting!
Lisa
 
BLOGGER TEMPLATE BY DESIGNER BLOGS