Showing posts with label copics. Show all posts

Wednesday, May 24, 2017

AMuse Release Day 3

Hi!  I am back with another peek at the awesomeness that is the new AMuse Release!  Don't forget there is free shipping for $30 and up being spent in the store until the 31st.  Now onto my project...


 hehehe! I just love funny animal puns and this one is too cute!  This scene was created with a mix of images and sentiment from the Hey Gull Friend Set and the Time to Party Set.  The Hey Gull Friend set is a fun mix of sentiments and these two little birds.

I've also used new paper tape that will be available after this release in yellow stripe and blue polka dot.  I've also popped this up on Petite Polka Dot in Papaya.  And I couldn't finish it without a little bling like the Twinkle Stickers - mini dots, multi.

Thanks so much for stopping by!  Make sure you hope over to the AMuse Studio Blog for more inspiration and a giveaway!

Happy Crafting!
Lisa

Sunday, May 21, 2017

You Make Me A Happy Camper

It's time for a new MarkerPOP Challenge, woot woot!  Which means fun, inspiration, and prizes!!!  Here is the new inspirational photo...


If I had a tent that lit up like this you better believe I'd go camping, hehehe!  And here is how I was inspired...


 I couldn't help but go right to my Avery Elle Glamper Campers Stamp Set when getting crafty with this challenge!  I stamped both campers onto cardstock, colored and cut them out.  Next, I worked on my night sky with a mix of Distress Ink and Distress Oxide.  I also added a few splashes of silver mist to represent stars in my sky.  I love how the My Favorite Things Rectangle Frame Die makes it easy for any sentiment to pop out, while not distracting from the rest of the scene.

I hope you will join us in our bi-weekly challenge, just use some markers that are carried in the MarkerPOP store and you are good to go!
Happy Crafting!
Lisa

Sunday, March 26, 2017

Hello Friend: A MarkerPOP Challenge

Happy Sunday everyone!!!  I am popping in today to share a fun card created for the newest MarkerPOP Challenge!  These challenges happen every other week, include an inspiration photo, and of course a prize, woot woot!!!  Take a look at this weeks challenge photo:

To play along just use at least 3 of the colors found in this photo! Here is what I've created...


I created this card by using the Altenew Be Strong Stamp set, and I was able to create a no line coloring look by first stamping the cacti with Altenew's Dye Ink in Limestone.  I then colored in my images and stamped the sentiment with Altenew's  Pure Graphite Ink.  I die cut the panel using MFT's Blue Print 31, and finished it off with some fun sequins.

Thanks so much for stopping by and I hope to see you play along with our challenge!
Happy Crafting!
Lisa

Wednesday, March 22, 2017

Ombre Coloring on Die Cuts

Hi!  Today I have a fun tutorial up on the MarkerPOP Blog and I hope you'll stop by to check it out!  Here is a sneak peek...


Also don't forget to enter the HUGE giveaway going on there too!
Happy Crafting!
Lisa

Thursday, March 16, 2017

Caffeine: Sanity in a Cup

Hi!  It is time for a reminder to join us in the STAMPlorations CAS Challenge this month, using the optional twist of sky blue...

Supplies Used: Plaid Maker ARTplorations Stencil, Stamplorations Coffee Happy, CUTplorations Luggage Tags Nesting Dies

Remember all products are welcome in the challenges, so I hope you will play along!
Happy Crafting!
Lisa

Wednesday, March 15, 2017

With Hugs

Hi!  Today I have a fun technique for adding depth to your solid stamped images, and you can find the full post over on the MarkerPOP Blog! Hope to see you stop by...


Happy Crafting!
Lisa

Sunday, March 12, 2017

MarkerPOP Challenge: Lucky in Love

Hi!  I hope you are having a nice weekend so far!  This weekend has been a lot of fun as we have been celebrating my youngest's Birthday with her friends at her Gymnastics Training Center.  So I'm popping in early this Sunday morning to share my take on the new MarkerPOP Challenge...


And here is what I've created...


 To create this card I started by stamping the sweet Rainbow Lucy Image from CC Designs and colored her in with various Copic® Markers.  After I cut her out I set her to the side.  I then created my marbled background using my Gansai Tambi Watercolors.  Once this had dried I cut the panel out with a Winnie and Walter die.  Next I stamped my sentiment created from a mix of Winnie and Walter The Big The Bold and The Happy with The Big The Bold and The Extras.  I then layered it all up on my cardbase and finished it with some Pretty Pink Posh Sequins.

Don't forget about the huge giveaway going on over on the MarkerPOP Blog, and can't wait to see what has inspired you for this challenge!
Happy Crafting!
Lisa

Wednesday, March 8, 2017

MarkerPOP: BE You and BE Happy! Giveaway Details Too!

Hello!  Today I'm sharing what might be a favorite new quote from the new Be Strong Stamp Set by Altenew on the MarkerPOP Blog...


Stop by their blog for full details, and there is a major giveaway going on over there too that you DO NOT WANT TO MISS!
Happy Crafting!
Lisa

Wednesday, March 1, 2017

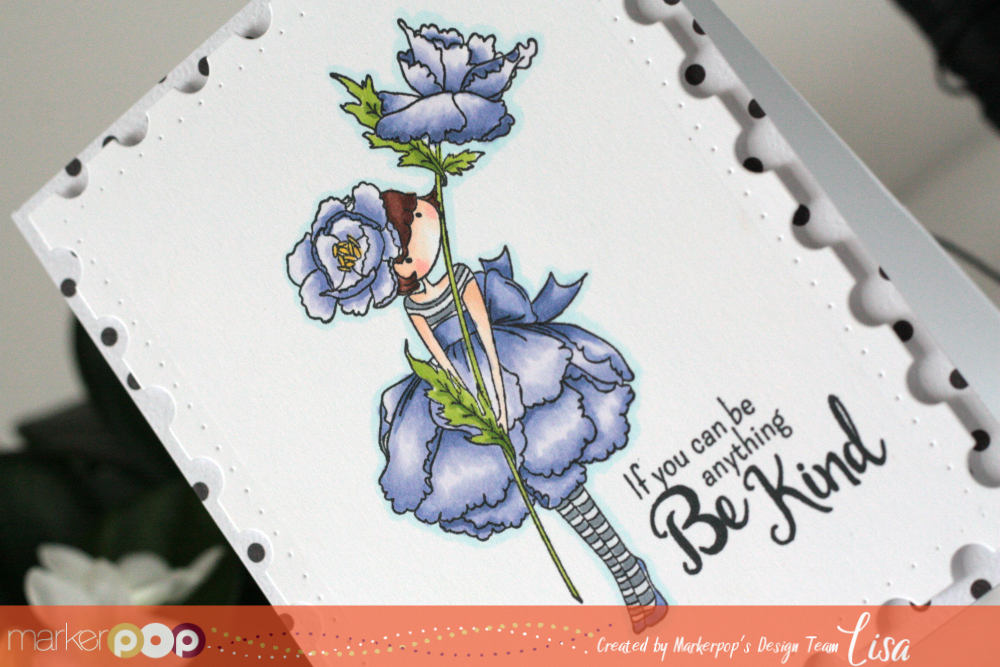
Be Kind...

Hello!  Today is my day up on the MarkerPOP Blog, so I hope you will get a chance to stop by and check out my latest project using new goodies!!!  Here is a peek to entice you...


See you over there and Happy Crafting!
Lisa

Monday, February 27, 2017

Hoppiness...

Hi!  You will find me sharing some hoppiness today on the Gerda Steiner Designs Blog, with this cutie...


This card was created with the new Hoppiness Stamp Set, and I hope you'll get a chance to check it out!
Happy Crafting!
Lisa


Sunday, February 26, 2017

One Kind Word... New MarkerPOP Challenge

Hi!  Welcome to a new bi-weekly challenge hosted by MarkerPOP, so make sure you pop on over to their blog for more inspiration and full challenge rules.  I'm popping in here to share my take on this weeks challenge...


And here is what I've created...

I loved the idea of an all grey card, but I wasn't fully feeling the winter scene as we have had some crazy warm days here in Ohio.  So instead I went with a wintery saying mixed with a beautiful floral image.  Both of these stamp sets are by Altenew and are from the Beautiful Quotes Set and the Botanical Garden (which is currently on sale, yay!).  For coloring in my image I've used Copic® Markers in C0, C1, C3, C5, and C7.  I also used a white gel pen and the Spectrum Noir Clear Glitter Pen Set for a beautiful shine.

I can not wait to see what you will create for this new challenge, and remember when you enter you are also entered to win a box full of crafting goodies! :)

Happy Crafting!
Lisa

Friday, February 24, 2017

Winnie and Walter: Stencil Challenge

Hi! It's Friday, woot woot!  And for my blog today I'm making it a Winnie and Walter day!  Woot, woot!  They are currently celebrating their Birthday, with a month long of challenges, special guest designers and more, so make sure you stop by and check it out!  This first post is for the Winnie and Walter: Stencil Challenge...


To create this card I started by going over my panel with an older stencil I've had in my stash and Glimmer Paste by Nuvo.  I LOVE this glimmer paste, it's so beautiful, and in person the shine is drool worthy.  For the flowers I stamped and embossed them with a silver embossing powder from the Lola's Bouquet Stamp Set.  I then colored the back of them with Copic Markers and fussy cut them out.  I finished it all of by stamping my sentiment from The Big The Bold and The Happy with white pigment ink onto black cardstock.

I am also linking this up to the Simon Says Stamp: Anything Goes Challenge

I hope you'll stop by later with more of my takes on their challenges!
Happy Crafting!
Lisa

Wednesday, February 22, 2017

Colored Vellum

Hi!  Today I have a fun piece to share on the MarkerPOP Blog involving coloring on vellum and the Concord & 9th Stamp Set Hello Lovely...


Hope to see you stop by for more details!
Happy Crafting!
Lisa

Sunday, February 12, 2017

Love Always - MarkerPOP Bi-Weekly Challenge

Hello!  I hope you are having a nice weekend so far!  I'm popping in for some crafty fun as a new MarkerPOP Challenge is starting today, woot woot!  Joining our challenges is so easy as the only thing that is required is that you use some type of marker that is carried in the MarkerPOP store.  And if you are running low on your markers you totally want to hit the store up as she recently got a restock in Copic® Markers.  Any who, enough enabling right?  (by the way did I mention her marker prices are incredible? hehehe!)  So onto this two week challenge inspirational photo...


Hello yummy photo!  Not only does the popcorn look so good, but the colors make my mouth water too!  (You don't find colors yummy?  That's just me? huh... well let's move on then shall we?...)

And here is my take on the photo...

 bwahahaha!  Look!  The birdies are on a date!  I LOVE it!!!  ( I also love exclamation points, but I think you already noticed that)  I was inspired by the colors in the photo and the sprinkling of red.  Right away my mind went to the Concord and 9th Love Always Stamp Set with the raining of hearts image.  I also was drawn to the large tag in the photo and grabbed my Pretty Pink Posh Craft Die Set Stitched Duo 1.  And to finish it off I used my Winnie and Walter So Tweet Stamp Set.

I hope to see you enter over the next two weeks for a chance to win a goody box of craft supplies!  (who doesn't love surprises when it comes to crafting goodies?!)

Happy Crafting!
Lisa

Friday, February 10, 2017

Somebunny Is Over On Gerda Steiner Designs Blog

Hello!  Yep, I'm totally nerdy with that title, and I'm totally ok with that haha!  Today you will find me over on the Gerda Steiner Designs Blog sharing this super cute card using the new Hoppiness Stamp Set...


 Full details on how this card came together can be found on their blog!  Hope to see you over there...


Thanks so much for stopping by, and don't forget to check this and other cute sets now available in the store!

Monday, February 6, 2017

We'll Be Friends Furr-ever...

Woot woot!  It's another post with those stinking cute kitties from the Buckets of Love Stamp Set designed by Gerda Steiner Designs.


To create this card I've used the Bucket's of Love Stamp Set again.  In my last two projects you saw me watercolor with this set, this time I've used my Copics.  I stamped, colored and cut out the kitties in the bucket.  I then layered it onto various patterned papers on my cardbase.  I also added my sentiment to some patterned paper.

I hope I've given you some various ideas on how this stamp set can be used for lots of occasions! Thanks for stopping by and Happy Crafting!

Lisa

Wednesday, February 1, 2017

Birthday Princess with MarkerPOP

Hi!  Today I have lots going on!  If you are here for my CAS-ual Friday Release Week Post Day #1 Click here ( you don't want to miss that! ) and I also have a post on my CutCardStock.com Home Decor, so you can see that post by clicking here.

Now you will find me posting a sweet little Birthday card on the MarkerPop Blog using newer MFT goodies and my Copics!  Here is a peek....


Don't forget to check out all of the new goodies that are making their way from CHA right to the store, and at a discount too! yay!

Happy Crafting!
Lisa

Monday, January 23, 2017

90th Birthday with Altenew

Happy Monday!  I was asked to create a card for a family members 90th Birthday, and as I was looking around for some inspiration I came across the latest Altenew Challenge and I immediately had an idea, so I went with it...


To create this card I used the Altenew Beautiful Day Stamp Set.  I started by embossing all of my images onto a heavy weight vellum with Gold embossing powder.  I then colored them all in with various Copic Markers, using the colors in the Inspiration photo.  Once they were colored I fussy cut everything out and started arranging them onto my cardbase.  I also die cut some numbers in gold foil.  Tips about coloring on vellum: Use darker colors than you might think if you want them to really show through, also give the coloring some time to dry before adding the next color.  Here is a close up of the shine...


I wish I had better photos to share with you of this card, and how beautiful it is in person but unfortunately it needed to go out in the mail right away and it just so happened to be a stormy day, so I had no luck with lighting.  However, the point of this card is to make someone happy and I'm sure it will have done just that.


Thanks so much for popping by today and Happy Crafting!
Lisa

Friday, January 20, 2017

Gerda Steiner Guest Designer

Hello and Happy Friday!!! It is Lisa Lahiff again on the Gerda Steiner Designs Blog and I'm back with one more cute card using the You're Koalafied Stamp Set, and this time I'm shaking things up...


To create this fun shaker I've used the You're Koalafied Stamp Set and Matching Dies.  I stamped all of my images onto separate cardstock and colored them in with Copic Markers before die cutting them out.  Next I created my shaker with patterned paper, acetate, sequins and foam adhesive.  I adhered the koala in the tree behind the first heart cut but in front of the acetate so it wouldn't get lost in a sea of heart sequins, ha!  Since the patterned paper had words all over it I didn't feel it needed a sentiment so I finished it off with a pink bow.


Thanks so much for stopping by today and Happy Crafting!

Lisa

Sunday, January 15, 2017

MarkerPOP Challenge

Hiya!  Today starts a new challenge on the MarkerPOP Blog, and I just love the magical photo we have to inspire you with...


So pretty!  And this is what I was inspired to create...


To create this card I started by diecutting my "starry" sky.  I actually used the My Favorite Things Snowfall Horizontal Die.  When I added some gold cardstock behind it, it worked perfectly as stars.  Next I diecut my grass with the Pretty Pink Posh Stitched Borders Die 1 with a dark green cardstock to play into the night scene.  I then stamped and heat embossed the sentiment from the MFT Birthday Bears Stamp Set.  I then stamped the bear and stars onto separate cardstock and colored them in with Copic Markers.  I wanted it to look like the star was lighting up in the bears hands so I used a gradual darker brown on one side of the bear and lighter colors on the side holding the star.  I then added some tickles to the stars for a final touch.


I can't wait to see what you create for this challenge!  All products are welcome as long as you use some form of markers carried in the store you're project is welcome!

Happy Crafting!
Lisa
 
BLOGGER TEMPLATE BY DESIGNER BLOGS