Showing posts with label Love Card. Show all posts

Tuesday, January 30, 2018

You're Wonderful

Hello!!!  Today I am over on the CAS-ual Fridays Blog sharing a sweet card that would be perfect for a friend or a loved one...


For full details on how this card came together please stop by their blog and check it out!  But before you go I have a code for you to use so you can spoil yourself in the store too!


Code: LISASENTME


Happy Crafting!
Lisa

Friday, January 5, 2018

Final CAS-ual Friday's Release Post

And we did it folks!  We have made it to the final day of the CAS-ual Fridays Stamps Release week!  What an awesome way to start off the New Year, don't you think?  Today's post is all about heart... no, I mean it literally... the set is called Heart to Heart!  This set is beautiful, perfect for Valentines or love projects, as well as makes great backgrounds...


To create my card I went very simple by stamping the Heart to Heart Stamp Set onto patterned paper and added Perfect Pearls in Gold in each circle opening.  While this dried I stamped my sentiment from the Heartfelt Sayings Set onto different patterned paper and trimmed it to fit the front of my card.

Make sure you pop by the CAS-ual Friday Blog for more inspiration with this beautiful set!  And remember that all of the new goodies are available now for purchase...


Happy Crafting/Shopping!
Lisa

Saturday, February 25, 2017

Winnie and Walter: Off the Page and Blending

Hello!  I'm back for day 2 sharing love for Winnie and Walter Products by playing along in their Birthday Challenges!  Today's card was based on two of the challenges: Winnie and Walter: Off the Page Challenge and the Blending Challenge.


 To create this card I originally has a masked heart on my panel and I began to cover the panel with Distress Ink in Mermaid Lagoon, Picked Raspberry, and Seedless Preserves.  While I was doing this a part of my heart lifted and some of my ink was sorely sticking out where my masked heart should have been.  I love the colors I had already blended and I didn't want to ditch the whole thing so I decided to cut out my masked heart and layer my panel to a cardbase instead.  As you can see my heart goes off the page hehehe.  I then stamped, colored, and die cut my little love birds from the So Tweet Set and added a sentiment inside the heart from The Big, The Bold, and The Happy set.  I finished the whole card off with enamel dots in similar blended colors.

I am also linking this up to the Simon Says Stamp: Anything Goes Challenge

Thanks so much for stopping by today, and I hope to see you later on when I share my next card for the challenge!
Happy Crafting!
Lisa

Thursday, February 16, 2017

Forever... STAMPlorations CAS Reminder

Hello!  Today I'm sharing a second creation for the newest STAMPlorations CAS Monthly Challenge as a way to remind you to join in the fun!  All products are welcome in the challenges and the challenge prompt is just a suggestion, so join in the fun!  Here is what I've created this time...


Supplies Used: CUTplorations - Art EdgesForever Word Die, ARTplorations Stencil - Zen Hearts

Hope to see you over there too!
Happy Crafting!
Lisa

Sunday, February 12, 2017

Love Always - MarkerPOP Bi-Weekly Challenge

Hello!  I hope you are having a nice weekend so far!  I'm popping in for some crafty fun as a new MarkerPOP Challenge is starting today, woot woot!  Joining our challenges is so easy as the only thing that is required is that you use some type of marker that is carried in the MarkerPOP store.  And if you are running low on your markers you totally want to hit the store up as she recently got a restock in Copic® Markers.  Any who, enough enabling right?  (by the way did I mention her marker prices are incredible? hehehe!)  So onto this two week challenge inspirational photo...


Hello yummy photo!  Not only does the popcorn look so good, but the colors make my mouth water too!  (You don't find colors yummy?  That's just me? huh... well let's move on then shall we?...)

And here is my take on the photo...

 bwahahaha!  Look!  The birdies are on a date!  I LOVE it!!!  ( I also love exclamation points, but I think you already noticed that)  I was inspired by the colors in the photo and the sprinkling of red.  Right away my mind went to the Concord and 9th Love Always Stamp Set with the raining of hearts image.  I also was drawn to the large tag in the photo and grabbed my Pretty Pink Posh Craft Die Set Stitched Duo 1.  And to finish it off I used my Winnie and Walter So Tweet Stamp Set.

I hope to see you enter over the next two weeks for a chance to win a goody box of craft supplies!  (who doesn't love surprises when it comes to crafting goodies?!)

Happy Crafting!
Lisa

Saturday, February 11, 2017

The Ton Challenge: Love

Hi!  It's me, here on a Saturday... shut the front door! hehehe!  I was able to squeeze in a little play time this week and I just had to play along with The Ton's newest challenge:

And so I went a little quirky and fun this month, throwing it back old school style with this take on the challenge...


To create this card I busted out an original set called Vintage Frames.  This happens to be one of my first Ton sets and I still love it :)  I grabbed a panel of black cardstock, stamped the frames all over it with Versamark ink and embossed them in various bright colors.  I then incorporated the love them inside the frames with more heat embossing.  Since the panel was so fun and funky in itself I just had to keep going and adhered it with a panel of bright pink cardstock at an angle.


Thanks so much for stopping by and checking out my card today!
Happy Crafting!
Lisa


Thursday, February 9, 2017

CAS-ual Fridays One Layer Love

Hi!  Today you will find me sharing a One Layer Valentine on the CAS-ual Fridays Blog with several new stamp sets!


 To create this one layer card I started by covering my cardbase with a mask of a negative heart cut.  I then used the Full On Floral Stamp Set and stamped over the open heart image with a gradient ink.  Next, I added my sentiment from the Heartfelt Sayings Set at an angle.  I felt like the card was still a little plain so I added some embossed lines along the top and distress ink along the edges.  I then went over he floral heart with clear rhinestones and a Gold Metallic Pen.

Have you seen all of the newest goodies that were released last week?!  If not make sure you check them out!  And just for you I have a discount for you to use and save off of your total purchase! woot woot!


Happy Crafting!
Lisa

Thursday, February 2, 2017

STAMPlorations February CAS Challenge

Hello, hello!  Yay!!!  It's a new Clean and Simple challenge day for STAMPlorations!  Plus, have you seen their newest release?!  LOVE it!!!  And I have a coupon code you can use on the already discounted price! Code: STAMPGIRLLISA

Now onto my card for the new challenge: (optional twist of hot pink).


To create this card I started by going over a panel of card stock with Picked Raspberry.  Once the entire panel was covered I went over it with the ARTplorations: Old Rose Prints Stencil and Nuvo Glimmer Paste.  The shine of this card is stunning in person!  While this sat off to dry I stamped the heart image and sentiment from the Funny Kinda Love Stamp Set.  I trimmed this and adhered it to a black strip.  This was all adhered to my stenciled panel with double sided adhesive.

Thanks so much for stopping by and I can't wait to see what you will be creating this month!
Happy Crafting!

Thursday, January 19, 2017

Love You to the Moon - STAMPlorations Challenge

Hello, hello my wonderful friends!  Today is when the STAMPlorations CAS team and GD's share more projects based on this months challenge with a twist as a way to hopefully inspire you to join in!  This month the twist is the color: Silver/Gray.  Now if you know me then you know that I love a good sentiment set and the Dee's Artsy Impressions Power of Words Stamp set is one of those...


To create this card I started by cutting my partnered paper that I wanted to use.  I then stamped the sentiment next to the perfect little space ship.  I dressed the moon and stars up with some tickles and set it off to dry.  I then cut a heart out and layered it all onto my cardbase.  Once the moon and stars were completely dry I die cut the whole panel with the Crazy Double Running Stitch Rectangle Die.  I wanted the stitching to have a more real effect by having it go through all of the layers and that is why I die cut it last.

Now onto some enabling, bwahahaha!
One week only! All stamps in the Dee's Artsy Impressions line are automatically 10% off! Plus Kathryn and Christmas is 20% off! Sale ends Monday, January 23.

Not only that, but I also have a code you can use to save even more!!! yay!!!
Enter: STAMPGIRLLISA for an extra 20% off!

Happy Crafting/Shopping!
Lisa

Monday, January 16, 2017

Guest Designer Surprise Hug

Hello!  It is Lisa Lahiff back here with another Guest Design Post for Gerda Steiner Designs!  I just can't get enough of the super cute Koalas in the You're Koalafied Stamp Set, I mean come on, just look at this little guy...


And guess what else... he's back in stock! yay!!!  To create this card I started by embossing my heart onto the front of my Kraft card base.  I then stamped my little koala with Memento ink several times for a clean and dark image.  I also added the sentiment and smaller hearts at this time.  To make sure my colors would stand out against the kraft I used my PrismaColored Pencils, and more specifically I started by coloring the koala and heart in with my white pencil first and then added my colors over the top.


Now hurry and snatch this guy up before he sells out again!  And while you are there you have to check out some of the other super cute critter sets available!


Happy Crafting!

Lisa

Friday, January 13, 2017

Marble(ing) - Gossip Column #6

Hello!  Happy Friday!!!  Today I'm popping in to share some cards that I've created inspired by latest Gossip Column written by the amazing Taheerah Atchia!  Yay!!!  This month she has taught us, inspired us, and simply had me drooling for all things marble.  So I had to join in!  ( You must read her article, you will feel so smart afterward too.  Just think of the kind of dinner conversation you can have later! Or heck, who you might be able to impress wink wink...)  Any who, I digress and with that said I will share a photo of my own projects that I created based on 4 card stock panels that I marbled myself using the nail polish technique.  And she was not kidding when she said this stuff is addictive, because I almost couldn't stop, and sadly my blue nail polish is no longer with us, but it's all in the name of art, right?!  So check it out...

It was really fun to watch the colors spread out in the water, and each time I dipped my cardstock in I had no clue out they would turn out.  Addicting!

Now onto my first creation...


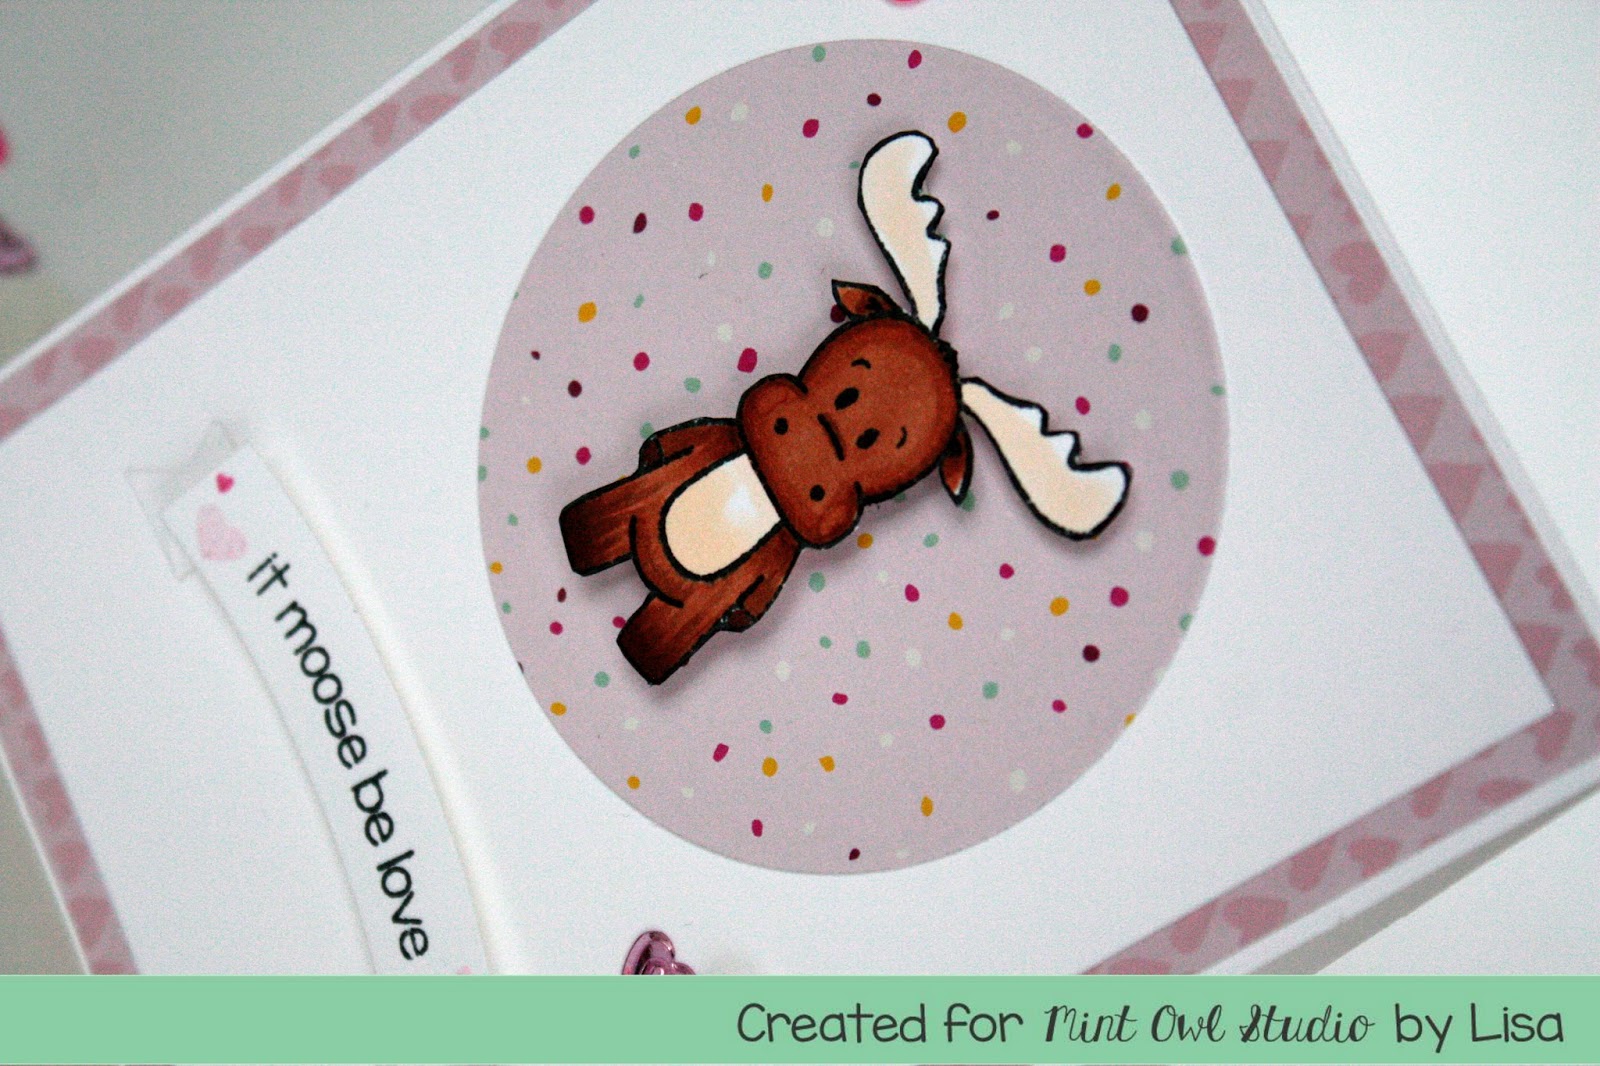
To create this card I took one of my panels and die cut a large heart.  I still had some spots left on my panel so I stamped and die cut the word love from the So Tweet Stamp Set, and layered it over the heart with foam adhesive.  Next I stamped my little bird and hair bow onto separate cardstock and colored them in with Copics before using the matching dies to cut them out.  When I layered them onto my cardbase it still felt a bit empty so I used some heart images from the same set and stamped them randomly, adding some matching splashes from one of my Ink Sprays.  Once this was dry I added the heart, bird and sentiment.  It was still missing something, so I went back and drew on some stitching and added some clear sequins.  Ta-da!

I hope you will stop by for my other two cards that I!
Happy Crafting!
Lisa

Tuesday, January 5, 2016

It Moose Be Love - Mint Owl Studios Release Day!!!


Hello and hip hip hooray!!!!  It is release day for Mint Owl Studios!!! You are going to love what Tracy has designed this month... there are 3 new stamp sets as well as 3 new sets of sequins! woot woot!  Today I am sharing a card I have created with the new mini set called "I Moose You", check it out...


He's soooo cute!!!!  And the sentiments with this set are too much fun!  I used some of the new sequins as some side accents on my card as well.  So go run over to the blog for more inspiration and remember all of these goodies are available at 8 am CST ( now )! So run run run!!!

Happy Crafting/shopping!
Lisa

Monday, January 4, 2016

Love Ya with CutCardstock.com

*To see my sneak peek for Mint Owl Studios make sure you scroll down!


Hello!!!  I am sharing a Love inspired card today on CutCardstock.com blog featuring their Stardream Metallic and Curious Metallic Card Stocks and A7 Envelope.  I would love for you to stop by and say hi, plus you'll get an inside look at how this all came together!

Happy Crafting!
Lisa

Sunday, November 1, 2015

V's Sweet Ideas Challenge Time + New Stamps!

Hello!  Today starts the new monthly challenge for V's Sweet Ideas, woo hoo!!!!!  And this month we are challenging you to get sparkly!  For my card I've used the newest set by V's Sweet Ideas called Sweet Break, it is so darn cute and fun!


To create this card I used StazOn ink to stamp the images and sentiment onto DCWV glitter paper.  I then used a white gel pen to color on the mints and trimmed everything out.  I then adhered it all to a diecut panel and stamped my hearts, colored them in and added stickles.  Finally, I added some sequins from V's Sweet Ideas Shop (currently sold out, but she carries other colors!).

I am also linking this up to the Simon Says Stamp Challenge: Anything Goes

I can not wait to see what you create for this challenge!
Happy Crafting!
Lisa

Wednesday, October 14, 2015

Love You Penguin Style

It's Wednesday, woo hoooooo!!!!  I'm not sure why I'm so happy, it could be that I'm super tired while writing this so I'm hoping the woo hooooo will wake me up and make me happy.... it worked... a little hehehe!  Anywho, here is a super cute card I am sharing on The Alley Way Stamps Blog today using the new Waddle Pals Stamp Set...


Aren't they so darn cute?!  I stamped the penguins and hats onto Glitter Cardstock from DCWV with StazOn Ink.  I then added some shading with Copics and fussy cut them out.  I also diecut the snowy hills and heart for the background.  I then adhered it onto patterned paper and stamped the sentiment from More Than Words Stamp Set and added some clear sequins.

I am linking this up to the Pintrest Inspired Challenge: I was inspired by the colors


Thanks so much for stopping by and Happy Crafting!
Lisa

Wednesday, February 11, 2015

It's the little things...

are you tired of lovey cards yet?  I hope not, cause I'm about to share another one!  hehehe!  You can also find this card up on The Alley Ways Stamps Blog today...


I absolutely love the look of birch trees and when the Branching Out Stamp set came to my door I was swooning!  Needless to say if you've been checking out the TAWS blog you've probably seen lots of wonderful uses for this new set.  Rather than color these beauties in I decided to paper piece them on some MME Necessities wood print patterned paper.  I then fussy cut away!  For a soft background I lightly went along the edges with distress ink.  The next thing I did was stamp the heart image on the larger birch tree and colored it in, for more dimension I tucked the two behind my hill and used foam adhesive on the one in front.  My sentiment came from the Words to Live By Stamp Set.

I am adding this sweet card to the Simon Says Stamp: All Things Bright and Beautiful 

Thanks for stopping by and I hope you have a beautiful day!
Happy Crafting!
Lisa

Thursday, January 8, 2015

Lot's of Sequins, New Stamps, and the new V's Sweet Ideas Challenge!!!

Woo hoo!!!  Lots of happy sparkly goodness to share today!  I always love when people cover things with sequins, and when I started playing with my new V's Sweet Ideas Organize It Stamp Set I just new this technique would be perfect!


Supplies Used:
Stamps: V's Sweet Ideas (Organize it!, Sweet Life Recorded)
Ink: Memento and SweetStamps.com
Sequins: V's Sweet Ideas ( Moonshine, Mambo Melon, Crimson Red)
Patterned Paper: Webster Pages
American Crafts Thickers
Foam Adhesive
Double Sided adhesive sheet


To create this card I started by hand cutting a heart on pink patterned paper.  I then adhered it to a two sided adhesive sheet, trimmed the heart again, and randomly placed my sequins.  I stamped my sentiment, line, and check mark on separate card stock trimmed and adhered to the front of the heart.  Finally, I backed it with patterned paper, adhered to cardbase using foam adhesive and added "u" and "r" stickers.

I am sharing this in the Simon Says Stamp Wed. Something New Challenge, as this is using my new Organize it Stamp set, woot woot!
And in the Simon Says Stamp Mon. Challenge: Make New Friends but Keep the Old, as the sequins are my old friend in this pairing ( so is the paper but shhh! don't tell it that!)

All products are welcome in the V's Sweet Ideas Challenge, and this month's theme is something new... so I can not wait to see what new thing you will be sharing with us!

Happy Crafting!
Lisa


Wednesday, January 7, 2015

Eye Adore You TAWS...

Hello!  I'm up on The Alley Way Stamps Blog again today with another cute card using the Oogles Stamp Set... I'm telling you I can't get enough of these little guys!!!  This time I'm getting mushy masculine style...


I started by die cutting the photo frame and stamping the sentiment on the bottom.  Next I stamped, colored and fussy cut my little monster out.  I then die cut some hearts, threw on some embellishments and ta da!!!  Finished!  I love quick and easy cards, plus I tried to do more of a masculine color scheme this time around.

I am adding this to the Simon Says Stamp: Anything Goes Challenge

Thanks for stopping by and Happy Crafting!
Lisa

Monday, December 29, 2014

The Alley Way Stamps Sneak Peek Week!!!

It's Sneak Peek Week!!!! YAY!!!! One of my favorite times is when I get to share new images from The Alley Way Stamps, and today I get to tease you with a little bit of one called Bubbly... you are going to LOVE it!!!  Check out what I've done with it so far...


I started by layering cardstock and patterned paper with foam adhesive.  Next I stamped the sentiment and the balloons on separate cardstock, colored and fussy cut them out.  I used some string and foam adhesive to help my sentiment take flight.  A few sequins, and bam!  Complete!

I am also entering this into the Simon Says Stamp: Anything Goes Challenge

Make sure you stop by the blog for a chance to win this set before it is released, woo hoo!!!  And double score you will find more inspiration and peeks at this new set!

Thanks for stopping by and Happy Crafting!!!
Lisa
 
BLOGGER TEMPLATE BY DESIGNER BLOGS