Showing posts with label paper piecing. Show all posts

Saturday, March 24, 2018

Winnie & Walter: For the Love of Paper (Giveaway)

Hello!  It is Lisa here again with my 4th post this month, and this week I'm focusing on something we all love... Paper.  I'm titling this weeks theme: For the Love of Paper, and I'm going to show some fun ways to use up your paper especially patterned paper.  Let's get started.

For my first project I'm using a scrap from a previous project last week (think rainbow heart) along with lots of diecutting the word You from the Dotty About You with Lydia Evans Cutaways...
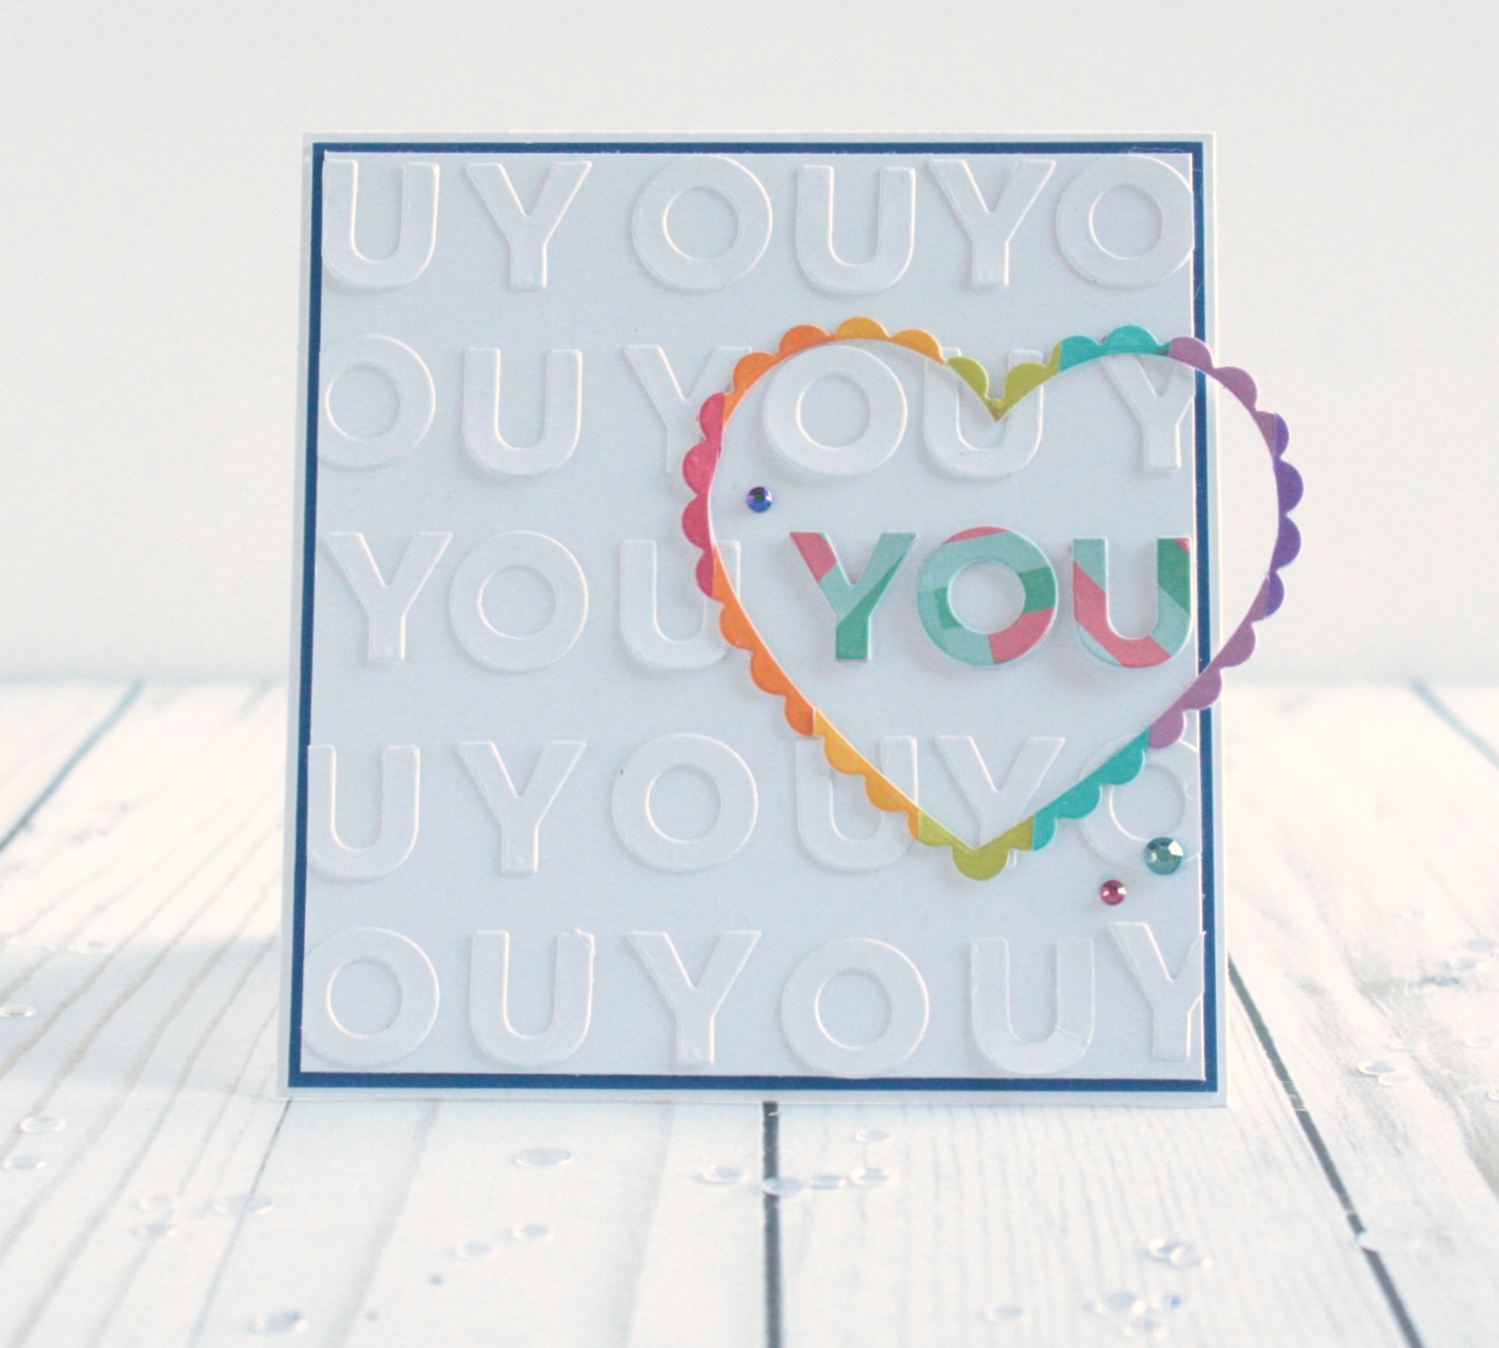

I love the clean and simple look of this card and how just the one you is pops with color.  Now I know that the patterned paper I used on the "you" doesn't exactly match the rainbow heart scrap, but somehow it works.  By grounding the diecut panel with a thin border of navy blue cardstock, I find the colors quite complimentary.  Of course a few flat back gems didn't hurt as a final touch, hehehe!


This next project was actually something I've wanted to try for years, and just never think to try it.  I once saw a beautiful card in a magazine created by Miriam Prantner that showed heat embossing an image onto patterned paper with clear embossing powder.  Once it had set the paper was then covered with ink, and thanks to the resisting properties of embossing the patterned paper only peeks through the clear embossed images.  This technique was perfect to use with the Scenery: Seeing Hearts Stamp Set...


Tip: Once the ink is applied buff the embossed areas with a microfiber cloth to help the pattern underneath show through.  I finished this card off with a few more strips of patterned paper, using a border die from the Georgette Border Cutaways on the pink strip.  I also used the In A Phrase: Hugs & Kisses with Angelica Suarez Cutaways for a sentiment and hearts from the Essentials: Audrey Cutaways as embellishments.


My third card includes the technique Paper Piecing.  This was one of the first technique I really played with when I first started card making, and while I don't use it as often anymore I still love the look of it on my projects. (I might have to add it back to my arsenal soon)


I was inspired by the tennis ball image in the Dog-gone Cute with Evelin T Designs set, so I decided to re-create a larger tennis ball as my cardbase.  I then stamped the St. Bernard onto a brownish patterned paper and a white.  I cut out the parts I wanted to be white and adhered them to the brown image before fussy cutting the whole thing.  I did the same thing with the bowl and tennis ball, but with different colored paper.  Since I felt the image looked a little flat I added some shading with my Spectrum Noir Markers.


Finally, for my fourth card I decided to use lots of scrap patterned paper that I keep in a bag.  I really try to keep as many scraps as I can for future use, but sometimes my scrap pile can become a bit overwhelming in itself.  This project is a great scrap buster, and it looks so bright and cheerful with all of the different colors.


The Dotty About You with Lydia Evans Cutaways has some great funky circle cuts in various sizes so I used them all to create my own patterned frame.  I then adhered a few coordinating flat circle sequins for extra shine.  For the center of the card I chose a sentiment from the In Bloom: Ashlee's Rosie Posie with Lydia Evans Stamp Set.  The script on the word beautiful, is so pretty and well beautiful!  I also like that you can mix and match your sentiment from this set with the various options provided.


And there you have it Winnie & Walter fans, a slew of fun ways to use Patterned Paper.  From diecutting, to embossing, and paper piecing we've covered just a few techniques that paper lovers everywhere can rejoice while creating.  I hope I've given you some inspiration to dust off an old love, or try something new either way I encourage you to get your craft on!  And don't forget to leave a comment for a chance to win a $30 gc to the Winnie & Walter Store! Plus you can earn a bonus entry by liking and commenting any of my coordinating Instagram posts!

Happy Crafting!
Lisa

Thursday, May 28, 2015

Suit Up! V's Sweet Ideas Has A New Stamp Set!

That's right, there is a new stamp set now available at V's Sweet Ideas and it is perfect for any guy in your life!  Suit Up has a fun classy man's suit image, as well as some great sentiments that are interchangable... check it out...


So fun, right?  And here is what I've created with this set...


To create this card I started by stamping the suit image down the right edge of my cardbase and trimmed around them.  Next I stamped the image on several sheets of patterned paper, colored, fussy cut and adhered to the cardbase.  Finally, I added the sentiment and a trim of blue paper on the inside so the cut edge stood out more.

Make sure you stop her store as she also has some new ribbons and more things in, so make sure you check them out!

Happy Crafting and thanks for stopping by!
Lisa

Wednesday, April 15, 2015

Groovy baby...

Oh I just LOVE the new Alley Way Stamp Feeling Groovy Stamp Set... it is soooo fun to play with!  And as soon as I saw this van image I had to play...


So fun, right?!  Best part about this card? It's one layer baby!!! (well if you don't count the paper piecing that is!) I started this card by stamping the van in the center of my cardbase.  I then masked it off and went covered the front of the card with a stencil and distress inks.  Next I removed the mask, colored various areas with Copics, paper peiced a floral design.  Stamped the sentiment in the corner from the Freebie Stamp Set of the Month, Far Out, with every $40 spent, and added an enamel dot in the center! :)

I am entering this into the following challenges:
Party Time Tuesdays: Anything Goes
Simon Says Stamp: In the Middle ( my little van is right in the middle of one groovy background hehehe!)
Virginia's View: Cards with Dimension/Layers - I actually have 3 layers on this one layer of sorts card (confusing, right?!) I have a stencil background, a stamped image and some paper piecing on top!

Happy Crafting!
Lisa

Monday, April 13, 2015

You Brighten My Day...

Hi, and Happy Monday!  I am popping in here to share a card that you can also find on The Alley Way Stamps Blog, that is just bound to make someone happy...


This little guy is from the new Phone Home Stamp Set... the little creatures in this set are so fun to play with!  I had fun stamping and fussy cutting him, coating him with glossy accents and them sticking some googly eyes on top hehehe!  Oh and I colored in his mouth a little too.  The sentiment comes from the More than Words Set.  These colors are not something I normally work with, but I LOVE it!  I usually go to pintrest for color mixing inspiration, but this time I was inspired by the colors in the paper pack itself! (Studio Calico)

I am entering this into the following challenge:
Fan-Tastic Tuesday Challenge: Anything Goes use a die ( I used two :) )
Party Time Tuesdays: Anything Goes

Thanks so much for stopping by and Happy Crafting!
Lisa

Sunday, March 8, 2015

You Make Life Fun...

Hi!  Ok, so this was really intended to be posted yesterday, but life happened and now I'm posting this today to hopefully bring a little smile your way... I haven't had much down time for "fun time" crafting so I finally made some for myself the other day ( you just have to do that every now and then to clear your head and make all of the deadline posts fun too ), and I'm so happy I did... these new Lawn Fawn goodies are too darn cute not to share...


This card was inspired by several challenges:
Lawnscaping: Polka dots and stripes

Marker Pop: Bright Colors
Daily Marker: 30 Day Coloring Challenge

This card includes lots of coloring and, paper piecing, and fun! hehehe!  I chose to color the brown polk a dot paper on my little dog because I didn't want the dots to stand out too much, and I felt it gave him a more "realistic" look. ( yummm, yeah because we all know that dogs like to teeter totter with birds in real life, right? )  I also didn't have a sunshine stamp, so I colored my own!  I added some dimension to my bird with coloring on his belly and a touch of "stitching" to my "clouds" with a white gel pen.  Wondering why I added ""'s around the words clouds?  Because these guys are actually the top to the trees in the Let's Play Stamp Set! :)

Thanks for stopping by, Happy Sunday and Happy Crafting!
Lisa

Supplies Used:
Stamps: Lawn Fawn Let's Play
Patterned Paper: Lawn Fawn
Ink: Lawn Fawn and Ranger Inc.
Die: Pretty Pink Posh
Various Copics
Brad
Foam Adhesive
Gel Pens: Sakura

Thursday, September 4, 2014

Miss You...

Hello!  Today I'm sharing a new card on The Alley Way Stamps Blog featuring several of the new Dino sets, that were just released this month!  They are so darn cute and fun to play with!  I've also gotten my paper piecing on for the Virginia's View Patterned Paper Challenge, woot woot!  So without further adieu...


Supplies Used:
Patterned Paper: Lawn Fawn (various 6 x 6 paper pads)
Stamps: The Alley Way Stamps ( Stomper, Prehistoric)
Ink: Memento
Various Copics
Die; Pretty Pink Posh
Distress Inks
Water brush

I started this card by die cutting my "grass" and water coloring with distress inks.  Next I stamped my little dino and rocks on several different patterned papers, and fussy cut.  After glueing everything together I began adhering things to my cardbase.  Finally I stamped my sentiment, adhered a border, and add it to my cardbase.  Hope he has brought you a little smile!

Thanks for stopping by and Happy Crafting!
Lisa
 
BLOGGER TEMPLATE BY DESIGNER BLOGS