Showing posts with label Guest Designer. Show all posts

Saturday, May 12, 2018

Have A Purr-fect Day with Gerda Steiner Stamps

Hi!  Today I'm Guest Designing on the Gerda Steiner Blog with a new cute critter set to share.  I hope you can pop in and check it out!  Plus you can see all of the new stamps in their store now!


Thanks so much for stopping by and Happy Crafting!
Lisa

Saturday, March 10, 2018

Winnie & Walter Spotlight #2

Hello!  I am so happy to be back with all of you again!  If you were able to catch my first Winnie & Walter Leading Lady post here, then you might remember that I am planning on having a theme for each of my posts through the month of March.  Today's post I am titling "Off the Page",  and I am going to focus on various mediums you can stamp on besides paper.  Don't get me wrong I love paper, and my collection can totally attest to that (as can my husband! lol), but there are lots of mediums out there that give beautiful and unique results that you may not have considered using.

For my first off the page project I'm going to share stamping on cork.  This tends to be a more common medium when stamping, and with good reason as it is easy to come by, gives great results, and adds fun texture...


 For this card I stamped this coffee cup and steam from the Warm Wishes to You Stamp Set right onto a piece of adhesive backed cork.  I then die cut both with the coordinating Cutaways.  I then added this onto a few sheets of patterned paper.  As a final touch I added glossy accents to represent the liquid in the cup, and I love the touch of shine too!


For the next medium I chose to work with adhesive Wood Veneer.  I love the look of wood and woodgrains on projects, and so I decided to see what else this medium had to offer in two very unique ways.  First, I wanted to stamp so sweet little critters and color them in. Here is what I came up with...


Isn't she too much fun?!  This image comes from the Purrfect with Evelin T Designs, and I've used the matching Cutaways too.  My cat is always trying to fit in the smallest boxes, or game boxes when we have them out, it's just too funny!  Now I knew I wanted to color my images in, but I also knew that wood soaks and spreads with the touch of inks so markers were out.  The same went for watercolors, obviously they would spread as well and I wanted a nice clean image.  That's when I looked over and saw my Spectrum Noir Blendable Pencils, and I have to say I'm hooked!  I was surprised at how easy it was to blend my colors as well.  After creating this card I already have all kinds of plans on coloring in some of those larger floral images onto this Wood Veneer, doesn't that just sound lovely?

As I stated before I knew that inks would spread easily on the Wood Veneer so I wanted to give it a little test.  Alcohol inks are all the rage right now, so I thought why not start there?  And friends I LOVE it!  They blend and spread like butter...


 For this card I started by blending purple and pink alcohol ink colors over an entire piece of Wood Veneer.  Since the ink dries quickly I was able to die cut my hearts from the True Dotty Heart Cutaways right away.  And of course I had to fill all of those little dots with a fun mix of flat back gems.  While these were drying, I created my background panel by stamping various sentiments from the Sentimental Love Stamp Set.  And viola!

I have one final card for today that mixes the Wood Veneer with a new medium: Craft Metal.  I have used Craft Metal before to emboss and die cut with, but I had never tried stamping on it so I gave it a go... and it worked!


I wanted to color my stamped flowers in with Alcohol Markers so I used a Alcohol friendly ink and set it to dry for a bit before working with it.  If I were to stamp onto this Craft Metal and try to color on it right away it would do nothing but smear the images.  I also heat set the images just to make sure they were fully dry (make sure you use tweezers or something besides your hand to hold it when you are heating it up, or the metal may burn your hands).    While you may not be able to layer your coloring on Craft Metal or blend colors, it will give you a watercolor look as the coloring dried, and I love it!  For this card I used the In Bloom: Ashlee's Rosie Posies with Lydia Evans, and it's coordinating cutaways, as well as left over Wood Veneer heart from the True Dotty Heart Cutaways.  I then finished it off with the Hugs and Kisses Cutaway layered in black and silver.

Whew!  And there you have it!  Lots of ways for you to go off the page with your crafting.  Do you have a favorite medium other than paper to work with?  Thanks so much for stopping by today, the amazingly sweet Shay is letting me do a $30 giveaway to one of my readers! Yay!!!  So leave a comment below telling me something you enjoy stamping on besides paper and you'll be entered to win.  Also, if you would like to follow me on my Instagram page, or if you already do leave me a little love to the corresponding Instagram picture and I'll give you an extra entry! :)
Happy Crafting!
Lisa

Saturday, March 3, 2018

Emboss-abilities With Winnie & Walter (Giveaway too!)

EEEEKKK!!!!  I can not believe I am Guest Designing for the whole month of March,  on the Winnie & Walter Blog!  This is a dream come true, and I am so very grateful to Shay for this amazing opportunity.  For my posts throughout the month I've decided to go with five various themes, with the hope of inspiring you and maybe even showing you something new so that you can get your Winnie & Walter goodies out and loved! 

Today's theme is titled Emboss-abilities, and I have three specific forms of embossing to share with all of you.  The first being the most typical method of embossing: Heat Embossing.  This technique never get's old when you get to watch the magic of your image coming to life as the embossing powder melts.


For this first card I've used the For Luck Stamp Set (this set will be available soon for purchase!), and I've heat embossed the three clovers within the set.  While the smaller two clovers are embossed with Gold Embossing Powder, I chose to give the largest clover a little more interest by embossing the top in Gold and the bottom half in Rose Gold.  I also chose to emboss these clovers onto vellum rather than plain cardstock.  I knew that I would be popping these up on patterned cardstock, so the vellum was perfect for allowing the patterned paper behind it to look softer around the clover.  I also chose to emboss my sentiment strip edges with gold embossing powder by rubbing the edges with my Versamark ink pad.  Finally, I cut my background panel with the Essentials: Lana Cutaways, adhered my clover, and added a few Metallic Gold Cupped Sequins.


The second type of Embossing that I wanted to share with all of you is Embossing Paste.  Embossing paste comes in lots of various forms, including with glitter as I have used here.  This specific Embossing Paste is called Glimmer Paste by Nuvo and this stuff sure shines! (I swear you're going to think I'm a Raccoon by the end of this post with all this glitz! And you might not be wrong lol)


I really love how this card turned out.  First, I needed something to run my embossing paste over so I created my own temporary stencil of sorts by using the negative of the large Love cut from the In a Word: Love Coordinating Cutaways and masking paper.  Once my mask was cut, I covered 3/4's of the word with Tanzanite Lavender and the top most part with Golden Crystal pastes.  After I had applied both colors I then removed the masking paper to reveal my embossed word.  You do not want to wait long to remove the paper as you will run the risk of the paper sticking to the paste and not giving you the crisp lines.  Another tip is to make sure your masking paper is pressed firmly onto your background, so that no paste can get under the paper.

Various embossing pastes have different drying times.  While mine was drying I worked on the rest of my card.  I wanted to layer my sentiment, so I chose the thin script love sentiment in this set and die cut it with Gold Cardstock.  I then stamped, heat embossed, and cut some floral images from the In Bloom: Ashlee's Rosie Posies with Lydia Evans and with it's coordinating dies.  I love the whimsical look of the flowers in this set, and I went with complimentary colors.  Once everything was dry I cut the panel from the Essentials: Audrey Cutaways.


For my final card today I chose to Dry Emboss the main sentiment using the In a Phrase: Hugs & Kisses with Angelica Suarez Cutaway.  Now, I know that this almost looks like it has been in-laid rather than embossed, but I promise you it wasn't I simply used the deep emboss technique with my Gemini rather than the lighter one. You can also tell it is embossed by the impression of the dies outter edge lines.


I love the dry embossing technique as it gives your dies one more way to be used!  Along with the hugs & kisses sentiment I also chose to dry emboss some hearts from the Essentials: Audrey Cutaways, and a small border die from the Georgette Border Cutaways.  I then stamped a few words from the Sentimental: Love Stamp Set in a contrasting black ink, and adhered my panel onto some patterned paper.  Next, I stamped, colored and die cut that sweet little pup from the Dog-gone Cute with Evelin T Designs and it's coordinating cutaway set.  For a finishing touch I added a few sequins.


Thank you so much for stopping by today for my first post as a Winnie & Walter Guest Designer!  I hope I've inspired you to get crafty, try something new, or pull out an old trick.  I would love for you to stop by my blog, Lisa's Creative Niche,  for a chance to win a $30 gift card so generously donated by Shay to the Winnie & Walter Store.


Happy Crafting!
Lisa

Thursday, February 1, 2018

Guest Designing for The Ton Challenge Blog... Pinch Me!!!!


EEEEEKKKK!!!!!  Can you believe it?!  I am Guest Designing for this month's challenge on The Ton's Challenge Blog!!!!  This is a huge honor, as I have been such a fan of Effie's products for the first blog hop all the way to celebrating their 3rd year just a week ago!  I am so excited for how much they've grown, and just how far I know they will continue to grow... Ah-mazing products my friends! Any who, enough with my gushing and fan girling let's get on to my Project...


To create my card I started by stamping my floral bouquet from the Peony Bouquet Stamp Set with a light Distress Ink.  Since the challenge is based on the word heart I knew I wanted to make a heart that blended into my project so I decided to use some spotlighting as well as a no line watercoloring technique.  Once I diecut a heart out of the center of my stamped image I began to go over the outer parts of the heart with a blue from my Spectrum Noir Aqua Pencils, and I made the inside of my heart red.  I love working with watercolored pencils as it is easy to build color and add details with the fine nibs.  Once I was done coloring I went in with a wet brush .  I then waited for everything to dry before moving on.  I stamped the sentiment with Versafine ink from the Timeless Icons Sentiments Set.  I wanted there to be a hint of movement in the background so I added a few splashes of gold watercolor, and finished the flowers off with Black Nuvo Drops.  A strip of Burnished Foil Tape in Pink was then run down the left side of the panel before I finally added it to my cardbase.


Thank you so much for stopping by today to check out my take on the challenge!  I hope you will get to play along!  And a huge thank you to Effie and her amazing team for letting me tag along, this has been such a huge honor!

Happy Crafting friends!
Lsia

Thursday, November 30, 2017

Guest Designing with Gerda Steiner Designs!

Hello!!!  I am back today Guest Designing on the Gerda Steiner Designs Blog, yay!!!  I've created a fun watercolored background with the Reindeer and Tree Stamp Set...


For full details on how my card came together I hope you'll take a minute and check out my post!  And while you are at it, you should really check out the Gerda Steiner Store there are so many cute and fun critter sets, and she constantly adding new ones!

Happy Crafting!
Lisa

Monday, February 6, 2017

We'll Be Friends Furr-ever...

Woot woot!  It's another post with those stinking cute kitties from the Buckets of Love Stamp Set designed by Gerda Steiner Designs.


To create this card I've used the Bucket's of Love Stamp Set again.  In my last two projects you saw me watercolor with this set, this time I've used my Copics.  I stamped, colored and cut out the kitties in the bucket.  I then layered it onto various patterned papers on my cardbase.  I also added my sentiment to some patterned paper.

I hope I've given you some various ideas on how this stamp set can be used for lots of occasions! Thanks for stopping by and Happy Crafting!

Lisa

Friday, January 20, 2017

Gerda Steiner Guest Designer

Hello and Happy Friday!!! It is Lisa Lahiff again on the Gerda Steiner Designs Blog and I'm back with one more cute card using the You're Koalafied Stamp Set, and this time I'm shaking things up...


To create this fun shaker I've used the You're Koalafied Stamp Set and Matching Dies.  I stamped all of my images onto separate cardstock and colored them in with Copic Markers before die cutting them out.  Next I created my shaker with patterned paper, acetate, sequins and foam adhesive.  I adhered the koala in the tree behind the first heart cut but in front of the acetate so it wouldn't get lost in a sea of heart sequins, ha!  Since the patterned paper had words all over it I didn't feel it needed a sentiment so I finished it off with a pink bow.


Thanks so much for stopping by today and Happy Crafting!

Lisa

Monday, January 16, 2017

Guest Designer Surprise Hug

Hello!  It is Lisa Lahiff back here with another Guest Design Post for Gerda Steiner Designs!  I just can't get enough of the super cute Koalas in the You're Koalafied Stamp Set, I mean come on, just look at this little guy...


And guess what else... he's back in stock! yay!!!  To create this card I started by embossing my heart onto the front of my Kraft card base.  I then stamped my little koala with Memento ink several times for a clean and dark image.  I also added the sentiment and smaller hearts at this time.  To make sure my colors would stand out against the kraft I used my PrismaColored Pencils, and more specifically I started by coloring the koala and heart in with my white pencil first and then added my colors over the top.


Now hurry and snatch this guy up before he sells out again!  And while you are there you have to check out some of the other super cute critter sets available!


Happy Crafting!

Lisa

Friday, January 6, 2017

You're Koalafied! Guesting on the Gerda Designs Blog

Hello!  I'm so excited to share that I am guest designing this month on the Gerda Steiner Designs Blog! Yay!!!  Their designs are so stinking cute, you have to check them out!  Any who, take a peek at what I've created today, and I hope to see you over there!


Happy Crafting!
Lisa

Sunday, August 14, 2016

Sea You Soon by Mini Guest Designer

Hello!  Today I have a special guest designer popping by my blog, whom happens to be my 5 year old daughter.  When I read to her the glitter challenge for the Kids Challenge at Simon Says Stamp she couldn't wait to break out my crafting supplies and get busy...


And the end result...


I just love it!  I love that she has so much fun making cards too and that I have someone to ohhh and ahhhhh at new products and goodies.

She used the Mint Owl Studio Stamps for her card, metallic colored pencils and various Martha Stewart Glitter.

Thanks so much for stopping by and for any love you may leave for Madeline, I know she'll be tickled pink to hear from you!
Happy Crafting!
Lisa

Thursday, March 17, 2016

GD for Ellen Hutson Pinsights Challenge


Ahhhh!!!  Did you read that title, and then re-read it again?!  ekkkkk!!!  I can not believe how honored I am to be asked to provide a little inspiration for the new Ellen Pin-sights Challenge, take a look at this beautiful photo that is sure to get your crafty mojo reeling...


And here is a little about how this challenge works...The Essentials by Ellen Pin-Sights challenge is a monthly inspirational challenge based on a Pinterest Inspired photo that is located on the CLASSroom blog. A random challenge participant will receive a $50 gift certificate to the Ellen Hutson store.  To be eligible, you MUST use Essentials by Ellen products and the photo badge as inspiration. There will be an inlinkz on the challenge post where you can submit. 

Now onto what I've created based on this challenge...


My favorite thing about this card was my labor of love homemade coverplate.  I love the look of coverplates and the intricacy they express on a project, since I don't own any of the Essentials by Ellen coverplates as of right now I figured I'd just make my own.  I started by choosing one of the floral dies from the Wild Garden Designer Dies set by Julie Ebersole.  I then took a trimmed panel of foiled yardstick and drew a slightly smaller rectangle on the backside.  I used this drawn rectangle as a guide for where to line the top cutting plate with the die and paper so that I would receive only partial cuts around the outer edge of the panel.  Next I randomly cut the entire floral image on the inside of my panel, while this does cut the full image I simply adhered it back in the same spot I cut it out from once it was placed onto my cradles.  I then diecut a frame in a gorgeous green card stock, matching the greens in the inspiration photo and adhered it with foam adhesive..  I stamped and embossed a heart image from the Fancy Thanks Stamp Set by Julie Ebersole, before trimming it and adding it to the lower right hand corner of my frame.  Finally I stamped my sentiment from the same stamp set, trimmed the card stock at an angle and finished it all off with some clear sequins.

Thanks so much for stopping by today (and a huge thank you to Ellen Hutson and her amazing team for having me join them today!) and Happy Crafting!
Lisa

Supplies Used:

Thursday, November 19, 2015

ScrapRoom Kit Blog Share

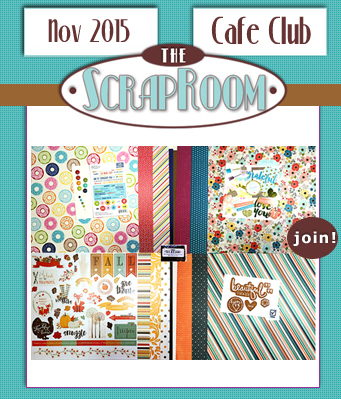
Hello!  Today I have a post up on the ScrapRoom Kit Blog!  I am loving my time as a Guest Designer for them, these kits are incredible!!!  Here is a peek at what you'll find, but please visit over on their blog for full details and more pictures!


Plus stop by and check out their awesome kits that really give you a variety of products that are new/currently on the market.


Hope to see you over there, and Happy Crafting!
Lisa
 
BLOGGER TEMPLATE BY DESIGNER BLOGS