Friday, January 29, 2016

DIY Wedding Invites Following 2 Trends

Hello and Happy Friday!!!  It's the weekend, woot woot, it's the weekend!!!!  Anywho, today you can find some DIY Wedding Invitations that I've created featuring 2 trends: Watercolor and Woodland, on the CutCardstock.com Blog.  I would love for you to stop by and give a little shout out if you have time, plus there are lots of photos and step by step how to's.  And of course I can't leave you without  a little sneak at what you'll find...


Happy Crafting!!!
Lisa

Thursday, January 28, 2016

A Makeover Craft Room Style

So I had mentioned sometime last week that we were doing lots of renovating on the lower level of our house.  It was a ton of work, and for a little while I felt like I was going bonkers living in a totally nonfunctioning mess, but it was so worth it!  I finally feel at peace and happy so I wanted to share a few photos of Before and After, hope you don't mind!

This is where I use to work before... It was my dining/crafting room hehehe!


And here is where I get to work now...


I LOVE IT!  I know I am extremely blessed to have such a wonderful husband who not only understands my crafting, but actually cares about it.  A lot of the changes came from his suggesting, and his wanting them for me.  We worked our butts off that's for sure, but I sure do love the outcome and I feel like one lucky lady.

Thanks for stopping by today and I hope you liked a little peek into my world!
Happy Crafting!
Lisa

PS- I died laughing when I ripped up the carpeting in here and all of the glitter that came out, bwahahaha!

Wednesday, January 27, 2016

Sorry I Moosed Your Birthday and Happy Envie too!

Hello!  Today I am sharing a super cute Moose card here and on The Mint Owl Studio Blog using the new I Moose You stamp set.  I'm also sharing a super fun way to decorate your envelopes using one of their first released sets called Happy Mail!


Isn't it so fun and happy?!  It makes me smile just looking at it and it isn't even for me! hehehe!  To create this card I started by stamping the moose, gift and tree on separate card stock and coloring them in with various Copics.  I then fussy cut them and set them to the side.  Next I die cutted a speech bubble for my sentiment and used lots of the fun little mini images in the I Moose You stamp set in lots of bright colors.  I added this to a patterned paper panel, diecut a grassy border and added it all to the front of my card.  Next I busted out the Happy Mail set and had fun mixing and matching the sentiments and images onto the back and front of the envelope.

I am entering this into the Simon Says Stamp: Anything Goes Challenge and into the Marker Pop: Anything Goes Challenge.

Happy Crafting!
Lisa

Tuesday, January 26, 2016

Love is in the Air... And on My Walls!

Hello!  Today I am sharing a step by step tutorial with photos on the DCWV blog on a super cute Valentine's Banner I've created!


I've created this banner using the DIY Project Stack®: Banners, the DIY Paperie mini cones kit, and the Shimmer Premium Stack. I also chose to add some bling with some DCWV Mini Adhesive Mirrors: Hearts and Dazzling Resin Jewel Self Adhesive Sheet in Pink.


I've also created a step by step tutorial with some photos so you can recreate this banner for your home, school, or party:
  1. Start by cutting out your selected pennants and adding a strip of Dazzling Resin Jewel Self Adhesive Sheet to the top of each one.

  1. You will then use twine or string and start to add your pennants by first punching a hole on each side of each one and tying them on. It was during this step that I folded a few mini cones in half. (Four, one on each side of the first and last pennant.)

  1. Next you will start creating your rosettes by trimming the strips provided in the DIY Banners Stack, score the strips at every 1/2”, and fold back and forth until you have 4 small “fanned” strips as shown in the photo below. You will then start gluing (hot glue works wonders for this step!) the strips together to create one long strip, also seen in the photo.

  1. Glue the ends of your strip together to create a circle.

  1. Using a paper punch, die, cutting machine, or hand cut 4 circles to be the backing for the rosettes. You will then push your scored circle down and glue to the back circle you've just created as seen below.

  1. Die cut, hand cut or use a cutting machine to create various sized hearts for embellishments and your letters for the banner. Add the letters together (the Xyron® Sticker Maker is fabulous for this!) and then to the rosettes with hot glue.

  1. Now you can add your lettered rosettes, hearts and other embellishments to your pennants and hang your banner for all to enjoy!


Thanks so much for stopping by today and Happy Crafting!
Lisa

Supplies Used:
Twine/Ribbon
Hole Punch
Scissors
Xyron® Sticker Maker
Hot Glue Gun and Glue


Friday, January 22, 2016

Make a Wish...

Hello! It's Friday, woot woot!  I have had some play time this week, so double yay!  And today I'm sharing a card I've created for the newest Lawnscaping Challenge: Watercoloring...


The bear kinda matches my new floor huh? hehehe!  Totally not done on purpose, but I love it!  I just wanted to have fun with this card and not feel confined by anything and watercoloring is great for that!  I just splashed lots of layers of colors onto watercolor paper and then flicked some fun gold and silvers on top before diecutting some stars.  I used the positive cuts of the stars to pop up on the front of my card.  And the sweet little bear was some much needed coloring therapy with Copics!

I am also linking this up to the Simon Says Stamp: Critter Challenge, and Marker Pop: Critters Challenge


Supplies Used:
Stamps: Lawn Fawn
Die Cuts: Lawn Fawn
Watercolor: Gansai Tambi
Copics

Thanks so much for stopping by and I hope you have a fabulous weekend!
Happy Crafting!
Lisa

Thursday, January 21, 2016

CAS with STAMPlorations Challenge Reminder

Hello!  Today I am sharing a second card based on the newest challenge on the STAMPloration's Blog which is all about everything Clean and Simple!  This month was the debut of this challenge, and we are back sharing a second round of inspiration and to remind you that you still have time to play along!  You can choose to use the suggested color twist to the challenge or not, which this month happens to be silver...


I used the Wedded Bliss Stamp Set and stamped with a gray Memento Luxe Ink Pad.  I stamped it right in the middle of a die cut square and layered it with foam adhesive onto my trimmed patterned paper.  I added some silver and white twine as well as some clear sequins.

I can not wait to see what you create, you can find the full rules here!
Happy Crafting!
Lisa

Wednesday, January 20, 2016

Simple Watercoloring with Mint Owl Studio

Hello!  Today I am sharing this super clean and simple watercolor card here and on the Mint Owl Studio Blog.  I have used the Some Bunny Stamp Set, and I love it's fresh feel...


I used distress markers and a paint brush with water to color in the bunnies and create my own grass. With a few dies from Lawn Fawn I added some interest and sky to my card.  Oh, and I can't forget to mention the one little pink gem she just had to have on her bow hehehe.

I am linking this up to the Paru's Card Making Challenge: New (as Mint Owl Studio is a new stamp company on the block)


Happy Crafting!
Lisa

Tuesday, January 19, 2016

Mix it Up Challenge with Essentials by Ellen

Hello!  So my life was upside down there for a bit with the renovation projects, but the results were totally worth it.  I haven't had a minute to take any pictures of it yet, but as soon as I do I'll share some pictures here :)!  Anywho, today I took a moment to just free my mind and play with a challenge for fun, and when I saw the Mix it Up Challenge with was Essentials by Ellen and MFT I just had to play along...


To create this card I used the Bold Bloom Die from Essentials by Ellen mixed with the LJD Together Forever Stamp Set by MFT Stamps.  Nothing too fancy to explain than some basic die cuts and stamping in the lower right corner.  I then used a mix of Pretty Pink Posh and V's Sweet Ideas Sequins.

I am also linking this up to Paru's Card Making Challenge: New (as this card is for a couples new beginning as husband and wife :) )


Thanks so much for visiting me today and Happy Crafting!
Lisa

Wednesday, January 13, 2016

Some Bunny is Thinking of You...

Hello!!!  Today I'm sharing a super cute bunny card made using the newest Mint Owl Studio Some Bunny Stamp Set.  I just love how sweet the little bunny images are in this set and the flowers are fun too!  Take a peek... ( I also used the 


To create this card I started by stamping the larger flowers up in the corner followed by the smaller ones. I then used the My Deer Stamp Set to fill in with deer spots ( in this case I made them berries) and the leaf image. Next I stamped the sentiment, and finally the little bunny in the opposite corner.  I used various Copics to color it all in, and if you look closely you can see that I added a soft blue behind the flowers by watercoloring with light blue ink.  And course it needed a little bling so I used a mix of clear sequins I had and the Electric Sequin Mix ( it is currently sold out, but it will be back so keep your eyes peeled! ).

I am also linking this up to the MarkerPop Challenge: Critters

Thank you so much for stopping by and check out the Mint Owl Blog for more inspiration and beautiful projects!
Happy Crafting!!!
Lisa

Tuesday, January 12, 2016

Hi!  So my life is complete chaos right now as we are renovating the whole first floor of our house with flooring... yay! (sarcastic yay as it is a ton of work, but happy yay as it really does look pretty and was much needed)  Needless to say my blog is quiet because everything in my house is literally shoved in piles on top of eachother.  Here's a quick peek into my world...


I hope to have a finished photo to share with all of you soon!
Hugs and Happy Crafting! ( do some crafting for me! hehehe! )
Lisa

Friday, January 8, 2016

It's Friday... and Winners Day!!! Woot Woot!!!

Hello and TGIF!!!!  This first week back to a schedule I assumed would be easy, but instead it felt exhausting!  Anywho, it is time to announce my winners today, woot woot!  I let my handsome hubby randomly throw numbers at me while watching a basketball game... totally efficient and classy bwahahaha!  And the winners are...

Prize #1: Amy McCue

Amy McCue said...
I hope to make more time for crafting!

Prize #2: Amy (Thetigershaven)

Amy#8546(TheTigersHaven) said...
I am hoping to get more crafty as the new year comes, also hoping that I can somehow get to a point where selling my art is in my near future.

Pize #3: Aileen

Aileen (mum) said...
Lisa I am a follower but thru Feedly. In australia sunny warm and happy. Hoping for this year, that my mum will get through another year without too much deterioration (Alzehimers) as I hate that I am loosing her.

Congratulations to all of my winners!  I wish I had prizes for all of my lovely followers, but I hope I'll at least be able to still bring some inspiration for you!  And I'm sure there will be more giveaways in the future! :)  A sincere thank you to all who entered my giveaways and to those who leave comments on my posts as they truly turn my days around!

Winners please email me at: Lisascreativeniche at gmail.com

Happy Friday and Crafting!
Lisa


Thursday, January 7, 2016

STAMPlorations CAS Challenge #1

Hello!  Today I am sharing my first take on the newest STAMPlorations CAS Challenge: #1 ...


And here is what I've created for this challenge:


To create this card I have used the Weathered Wood Stencil, and Fond Expressions 2 Stamp Set.  I started by laying my stencil down and going over it with chalk inks in gray and a touch of white.  I then set this off to the side to dry.  Next I die cut a vellum circle to soften my sentiment and a tag to emboss my sentiment on.  I then tied a little twine through the top and ta - da!  I really like this card and I think it could be used for a woman or a man as it is very neutral in color.

Hope this inspires you to get inky with us and link up to this new challenge!  Remember ALL products are welcome!

Happy Crafting!
Lisa

Wednesday, January 6, 2016

Fawned of You Goody Bag

Hello!  Today I am up on The Mint Owl Studio Blog sharing a cute little goody bag I have created using the new My Deer Stamp set as well as the new Hearts and Kisses Mix.  There were 3 new stamps and 3 new sequin sets added to the store yesterday, so run over to pick some up before they are gone!


To create this goody bag I started by diecutting my heart and embossing the sentiment in the upper left corner in black.  I then stamped the tree, hearts, and deer image onto separate card stock colored them in with various copics and fussy cut.  I finally layered them all together onto a doily, and used it as the perfect way to close up my goody bag.  I also added hearts from the Hearts and Kisses Mix.

Thanks so much for stopping by today and Happy Crafting!
Lisa

Supplies Used:
  

Tuesday, January 5, 2016

It Moose Be Love - Mint Owl Studios Release Day!!!


Hello and hip hip hooray!!!!  It is release day for Mint Owl Studios!!! You are going to love what Tracy has designed this month... there are 3 new stamp sets as well as 3 new sets of sequins! woot woot!  Today I am sharing a card I have created with the new mini set called "I Moose You", check it out...


He's soooo cute!!!!  And the sentiments with this set are too much fun!  I used some of the new sequins as some side accents on my card as well.  So go run over to the blog for more inspiration and remember all of these goodies are available at 8 am CST ( now )! So run run run!!!

Happy Crafting/shopping!
Lisa

Monday, January 4, 2016

Mint Owl Studios Sneak Peek Some Bunny

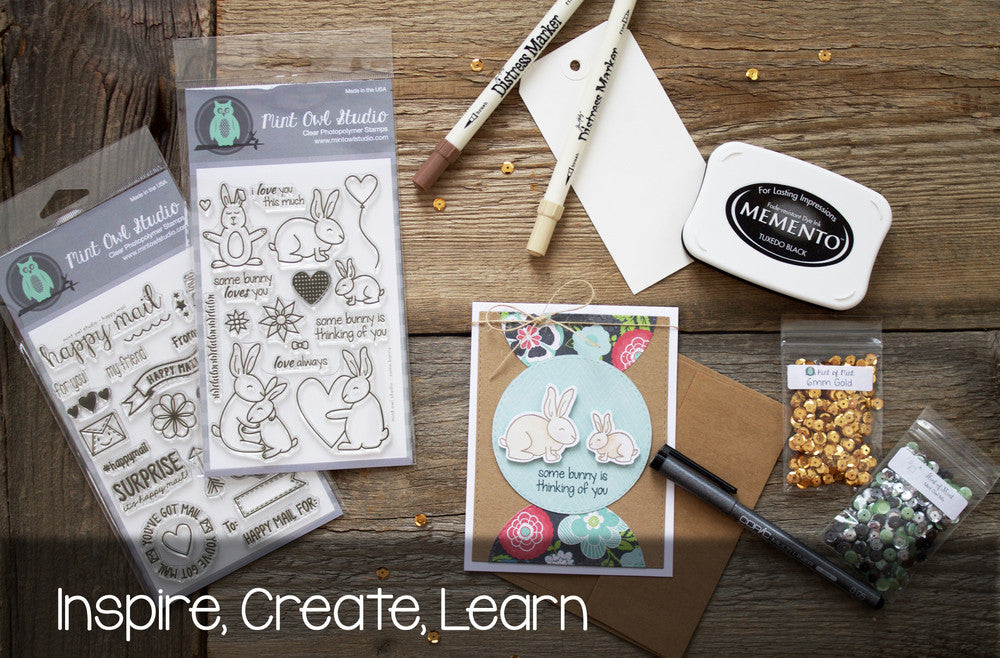
Hello and Happy 2016!  I'm so excited to start my first post for the new year with a sneak peek of the new Some Bunny Stamp Set by Mint Owl Studios, eeeekkkk!!!!  I was able to share my wonderful news of being on the Mint Owl Studios Design Team on my Instagram account and on FB, but I hadn't shared it here yet! *gasp* So please go to this post to see the first and new Mint Owl Studios Design Team!  I am sooooo honored to be a part of it all, and I am totally in love with Tracy's designs! ( check out the current stamp sets here )

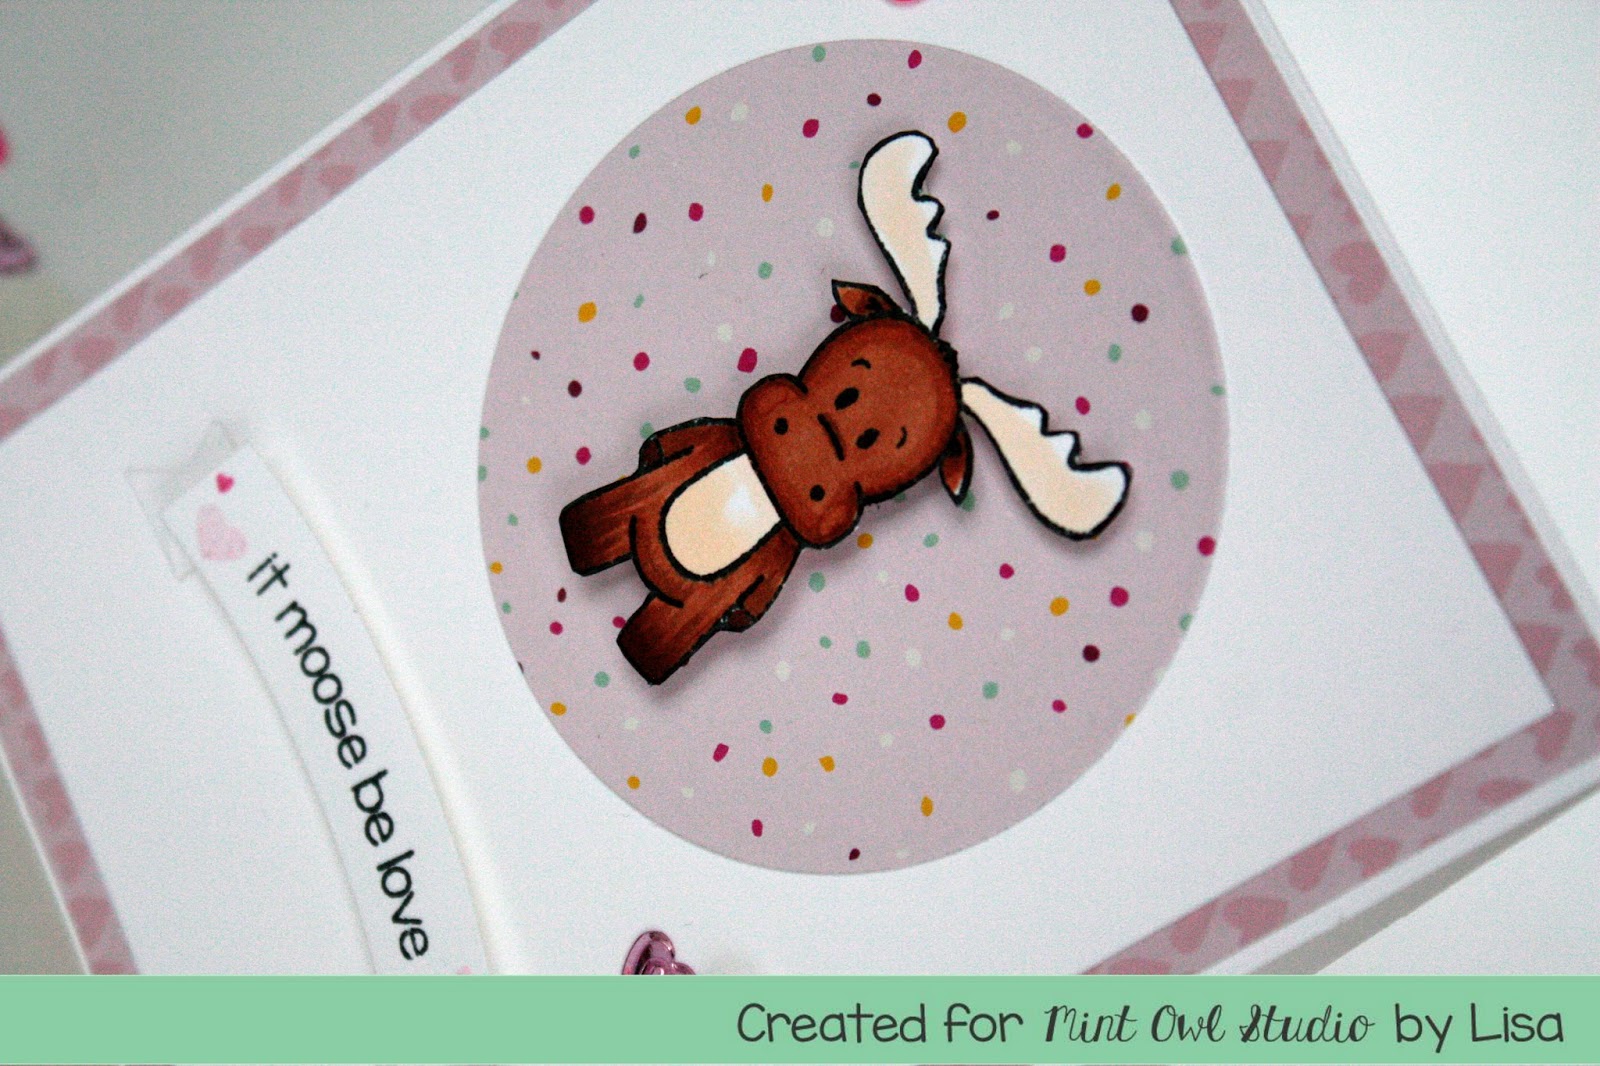
Ok, no more waiting, here is the sneak peek I teased you with at the beginning of this post...


Ok, seriously, could a bunny hugging a heart be any cuter?!  I LOVE this image!  Anywho, to create this sweet little card I started by stamping the bunny with his heart and coloring him in with various copics.  I then created my shaker elements with circle dies and of course new sequins that will be available tomorrow in the Mint Owl Studios Shop! (pssst - right now she has some gorgeous sequin collections including my favorite: Electric Mix)  I then adhered it to some patterned paper before stamping and diecutting my sentiment onto a flag.

You must run over to the Mint Owl Studios Blog now to see the sneaks from the other new products all being released tomorrow! Woot woot!

Happy Crafting/drooling! (hehehe!)
Lisa

Love Ya with CutCardstock.com

*To see my sneak peek for Mint Owl Studios make sure you scroll down!


Hello!!!  I am sharing a Love inspired card today on CutCardstock.com blog featuring their Stardream Metallic and Curious Metallic Card Stocks and A7 Envelope.  I would love for you to stop by and say hi, plus you'll get an inside look at how this all came together!

Happy Crafting!
Lisa
 
BLOGGER TEMPLATE BY DESIGNER BLOGS