Hi! Today I am popping in to share this sweet and super simple Monthly Binder Divider using some amazing ADORNit products including the Calendar Girls Art Play Coloring Book and Patterned Papers from the Blender Basics Collection...
Of course this cutie is being stored in my Calendar Girls Planner... LOVE IT!
This panel was colored with basic colored pencils. While these Coloring book pages are created on Watercolor Paper, it doesn't mean you can't use other mediums. I think the colored pencils give it almost a classic children's book look.
Thanks so much for stopping by and Happy Crafting!
Lisa
Showing posts with label Prismacolor Premier Pencils. Show all posts
Friday, April 14, 2017
Saturday, February 25, 2017
Winnie and Walter: Cute Critter Challenge and Three Challenge
I'm back with card #2 today celebrating Winnie and Walter's Birthday!!! This time I have a new to me type of card to share, which include two die cut windows and a trifold. This card was inspired by the Winnie and Walter: Cute Critter Challenge and the Three Challenge: I used 3 stamps, 3 dies, 3 birds, 3 hearts, 3 panels to the card :)
To create this card I started by folding my cardbase into thirds. I then lined my largest circle die on the front panel and cut followed by diecutting a smaller circle in the second panel. I then stamped and colored the chicks, love, and heart balloon from the So Tweet Stamp Set, after they were die cut from the matching dies I added them layer by layer onto the panels. Once everything had dried I closed the panels and stamped the inside sentiment and hearts. I just love fun interactive cards don't you? Here's another peek at the layers in this card...
I am also linking this guy up to the Simon Says Stamp: Anything Goes Challenge
Thanks so much for visiting me today and feel free to scroll down to see my first post from earlier today!
Happy Crafting!
Lisa
To create this card I started by folding my cardbase into thirds. I then lined my largest circle die on the front panel and cut followed by diecutting a smaller circle in the second panel. I then stamped and colored the chicks, love, and heart balloon from the So Tweet Stamp Set, after they were die cut from the matching dies I added them layer by layer onto the panels. Once everything had dried I closed the panels and stamped the inside sentiment and hearts. I just love fun interactive cards don't you? Here's another peek at the layers in this card...
I am also linking this guy up to the Simon Says Stamp: Anything Goes Challenge
Thanks so much for visiting me today and feel free to scroll down to see my first post from earlier today!
Happy Crafting!
Lisa
Labels:wedding cards
Prismacolor Premier Pencils,
tri-fold,
Winnie & Walter
Winnie and Walter: Off the Page and Blending
Hello! I'm back for day 2 sharing love for Winnie and Walter Products by playing along in their Birthday Challenges! Today's card was based on two of the challenges: Winnie and Walter: Off the Page Challenge and the Blending Challenge.
To create this card I originally has a masked heart on my panel and I began to cover the panel with Distress Ink in Mermaid Lagoon, Picked Raspberry, and Seedless Preserves. While I was doing this a part of my heart lifted and some of my ink was sorely sticking out where my masked heart should have been. I love the colors I had already blended and I didn't want to ditch the whole thing so I decided to cut out my masked heart and layer my panel to a cardbase instead. As you can see my heart goes off the page hehehe. I then stamped, colored, and die cut my little love birds from the So Tweet Set and added a sentiment inside the heart from The Big, The Bold, and The Happy set. I finished the whole card off with enamel dots in similar blended colors.
I am also linking this up to the Simon Says Stamp: Anything Goes Challenge
Thanks so much for stopping by today, and I hope to see you later on when I share my next card for the challenge!
Happy Crafting!
Lisa
Thanks so much for stopping by today, and I hope to see you later on when I share my next card for the challenge!
Happy Crafting!
Lisa
Labels:wedding cards
distress inks,
Love Card,
Prismacolor Premier Pencils,
Winnie & Walter
Friday, February 24, 2017
Winnie and Walter: Pattern-Making
My next card was a labor of love, but so worth it! This time I've created a card for the Winnie and Walter: Pattern Making Challenge. I've used The Big The Bold and The Extras for the roses and sentiment on this card...
Again I am entering this into the Simon Says Stamp Challenge: Anything Goes
Thanks for stopping by and happy crafting!
Lisa
I had so much fun coloring these roses colors of the rainbow with my Prismacolor Pencils. I was also proud of myself for remembering to leave highlights! After I colored the back panel I stamped and cut out the sentiment on the banner.
Again I am entering this into the Simon Says Stamp Challenge: Anything Goes
Thanks for stopping by and happy crafting!
Lisa
Labels:wedding cards
Prismacolor Premier Pencils,
Winnie & Walter
Monday, February 13, 2017
STAMPlorations TAGplorations Love Blog Hop!!!
Woo hoo!!! It is time for a Blog Hop celebrating our love for Tags and STAMPlorations! Make sure you are stopping by the STAMPlorations blog every day for inspiration, fun, and of course giveaways!!! The last day to comment is February 14th, so make sure you keep hopping along tomorrow too! Giveaway details at the end of the post, because now I'm going to share my tags...
I tell you I just can't get enough of the sentiments in the Funny Kinda Love Stamp Set!
To create this first tag I used the Luggage Tags Nesting Dies and Neenah Solar White Card stock. I stamped the image and sentiments first before coloring them in with Prisma Color Pencils. I then adhered some clear sequins, ribbon and twine to finish it.
This next tag is more simple in nature. After diecutting the tag I used the Zen Hearts Stencil with Distress Ink in Peacock. Since the stenciled image was too big to fit as a whole on the tag so I angled it and went over it with ink. I then added some dimension with Red Nuvo Drops. I liked the way the red popped against the blue so I decided to add a red ribbon too.
And I have a great discount code for you to use too! Save 20% off your total purchase! (Cannot combine this code with other codes, but you can use it on regular and sale price items!!!)
CODE: STAMPGIRLLISA
Well that's it for me! Stop over by the STAMPlorations Blog for more details and inspiration. Now for some giveaway details...
Prizes:
- (3) randomly drawn winners from all comments left on the STAMP blog and participating designers blog will each receive a $10 gift certificate to the store
- (1) randomly drawn participant in the Love TAGplorations linky party will receive her choice of stamp set (Pocket Blooms, A Full Heart, or Two of Us)
- (1) randomly drawn participant in the Love TAGplorations linky party will receive her choice of any 2 of the new love-themed dies (Love, Always, XOXO, Forever, You & Me, Clustered Hearts)
- (1) randomly drawn participant in the Love TAGplorations linky party will receive her choice of tag set: Luggage Tags or ATC/Tag Builder
Happy Crafting/ Hopping!
Lisa
Labels:wedding cards
blog hop,
Prismacolor Premier Pencils,
Stamplorations,
stencil,
tags
Monday, January 16, 2017
Guest Designer Surprise Hug
Hello! It is Lisa Lahiff back here with another Guest Design Post for Gerda Steiner Designs! I just can't get enough of the super cute Koalas in the You're Koalafied Stamp Set, I mean come on, just look at this little guy...
And guess what else... he's back in stock! yay!!! To create this card I started by embossing my heart onto the front of my Kraft card base. I then stamped my little koala with Memento ink several times for a clean and dark image. I also added the sentiment and smaller hearts at this time. To make sure my colors would stand out against the kraft I used my PrismaColored Pencils, and more specifically I started by coloring the koala and heart in with my white pencil first and then added my colors over the top.
Now hurry and snatch this guy up before he sells out again! And while you are there you have to check out some of the other super cute critter sets available!
Happy Crafting!
Lisa
And guess what else... he's back in stock! yay!!! To create this card I started by embossing my heart onto the front of my Kraft card base. I then stamped my little koala with Memento ink several times for a clean and dark image. I also added the sentiment and smaller hearts at this time. To make sure my colors would stand out against the kraft I used my PrismaColored Pencils, and more specifically I started by coloring the koala and heart in with my white pencil first and then added my colors over the top.
Now hurry and snatch this guy up before he sells out again! And while you are there you have to check out some of the other super cute critter sets available!
Happy Crafting!
Lisa
Labels:wedding cards
Gerda Steiner Designs,
Guest Designer,
Love Card,
Prismacolor Premier Pencils
Saturday, November 19, 2016
Naughty or Nice?
Hello, and Happy Saturday! I am here and on the Mint Owl Studio Blog today sharing a cute little Santa Gift Tag...
This tag was created using the Dear Santa Stamp Set, isn't this round little Santa too cute?! You have to see the reindeer in this set too! I started by die cutting the shape to my tag. Next I stamped the images and sentiment with Memento ink and colored them in with Prismacolor pencils. I then added some dots in a white enamel gel, that unfortunately turned clear, but I still like the look of the texture. To finish the tag off I used red and green twine.
I am linking this up to the 25 days of Christmas tags hosted by the amazing Tracey McNeely, I just love this event and make sure you check out her blog every day for more inspiration.
Happy Crafting!
Lisa
This tag was created using the Dear Santa Stamp Set, isn't this round little Santa too cute?! You have to see the reindeer in this set too! I started by die cutting the shape to my tag. Next I stamped the images and sentiment with Memento ink and colored them in with Prismacolor pencils. I then added some dots in a white enamel gel, that unfortunately turned clear, but I still like the look of the texture. To finish the tag off I used red and green twine.
I am linking this up to the 25 days of Christmas tags hosted by the amazing Tracey McNeely, I just love this event and make sure you check out her blog every day for more inspiration.
Happy Crafting!
Lisa
Labels:wedding cards
Christmas tags,
Prismacolor Premier Pencils
Friday, October 14, 2016
Mint Owl Studio New Release Blog Hop *Giveaway*
Hello again! This is my second post for the day, to find my DCWV/Chameleon Blog Hop Post please scroll down! :)
Now I am back as part of the Mint Owl Studio October Release!!! yay!!!! This new release has a wonderful mix of cute, snarky and holiday all in one, so you're bound to find something you just have to have. I decided to create a cute little card with the new mini Sloth Hang Out Stamp Set...
Isn't he just so cute? I love the matching sentiments in this set too! I stamped this little guy and some leaf images onto kraft cardstock and colored him in with my PrismaColor Pencils. I then diecut the panel and added it to some patterned paper. To finish the card off I used some matching enamel dots and some white twine.
Thanks so much for making your way over here and make sure you hop along to the rest of the blogs for your chance to win this months new released sets! :)
Happy Crafting/Hopping!
Lisa
Now I am back as part of the Mint Owl Studio October Release!!! yay!!!! This new release has a wonderful mix of cute, snarky and holiday all in one, so you're bound to find something you just have to have. I decided to create a cute little card with the new mini Sloth Hang Out Stamp Set...
Isn't he just so cute? I love the matching sentiments in this set too! I stamped this little guy and some leaf images onto kraft cardstock and colored him in with my PrismaColor Pencils. I then diecut the panel and added it to some patterned paper. To finish the card off I used some matching enamel dots and some white twine.
Thanks so much for making your way over here and make sure you hop along to the rest of the blogs for your chance to win this months new released sets! :)
Hop List:
Happy Crafting/Hopping!
Lisa
Labels:wedding cards
blog hop,
Mint Owl Studios,
Prismacolor Premier Pencils
Wednesday, August 31, 2016
Color Blooms Blog Hop
Hello! Today we are hopping along sharing the newly released Color Blooms Coloring Book created by the amazing owner and creator, Shery Russ and it is wonderful!!! In this blog hop we will show you pictures of pages we have colored in the book and the projects we've created with them. Here are my before pictures... ( I've used Prismacolor Premier Colored Pencils )
And with this colored page and image I was able to create a set of 5 greeting cards...
(Supplies Used from STAMPlorations with the coloring pages... Awesome Word Die - CUTploration, Happy Word Die - CUTploration, Crazy Double Running Stitch Rectangle Nesting Dies, Blooming Buds, New Beginnings, Sentiment Builders: Happy)
Now there can't be a blog hop without some prizes so here are the details on how to get your name entered for a chance to win one of the prizes...
- leave comments on the STAMPlorations blog and on designers’ blogs
- participate in the linky party by downloading the Color Blooms page sampler, creating a project out of it, and then linking it up.
- like, comment, and tag a friend on the Facebook page post.
prizes:
- ONE (1) commenter randomly drawn from our Facebook page will win a $10 gift certificate for herself and a $10 gift certificate for one friend she/he tags in their comment
- ONE (1) commenter randomly drawn from all comments left on the STAMP blog and designers' blogs will win a $10 gift certificate
- ONE (1) participant randomly drawn from the linky party entries will win a copy of Color Blooms and a $15 gift certificate
Thank you so much for stopping by today and I wish you the best of luck!
Happy Crafting!
Lisa
Labels:wedding cards
blog hop,
Prismacolor Premier Pencils,
Stamplorations
Thursday, July 21, 2016
Stamplorations CAS Challenge Reminder
Hello wonderful crafty friends! Today I am posting a little reminder for this month's STAMP-lorations CAS Challenge. Every month is anything CAS, and any products can be used... we also add in an optional twist and this time the twist is the color orange. In my first project I used a very bright orange, so this time I toned it down and went with a more burnt orange color...
To create this card I started by stamping the sentiments randomly onto a panel. I then went over the panel with distress ink along all of the edges. Next I stamped the cup onto separate card stock and colored in with my PrismaColor Pencils. I cut this out and added it to the panel with foam adhesive. I added some brown sequins to pop out of my cup and adhered it to a blue panel. This was then added onto Kraft Card stock and I tied on a twine bow for the top.
Thanks so much for stopping by and I can't wait to see what you create for the challenge!
Happy Crafting!
Lisa
To create this card I started by stamping the sentiments randomly onto a panel. I then went over the panel with distress ink along all of the edges. Next I stamped the cup onto separate card stock and colored in with my PrismaColor Pencils. I cut this out and added it to the panel with foam adhesive. I added some brown sequins to pop out of my cup and adhered it to a blue panel. This was then added onto Kraft Card stock and I tied on a twine bow for the top.
Thanks so much for stopping by and I can't wait to see what you create for the challenge!
Happy Crafting!
Lisa
Labels:wedding cards
coffee card,
Prismacolor Premier Pencils,
Stamplorations
Tuesday, July 19, 2016
Oh What Fun! I'm Up on the CAS-ual Fridays Stamps Blog
Hello and what fun indeed! Today you can find me here and on the CAS-ual Fridays Stamps Blog sharing a cute Christmas card using new goodies such as the Funky Flakes and Sleigh Fri-dies along with the new Sleighride Stamp Set to create this little scene... ( who doesn't love Christmas in July?! )
When I pulled this stamp set out the original project I had created with the sleighs used very traditional red and green colors, so this time I wanted to go with a rich blue sleigh... I don't know, sometimes deep blues make me think of rich velvet which felt perfect for this image.
To create this card I started by stamping and coloring my sleigh and jingle bells in with a mix of Copic Markers and Prismacolor Pencils, now this was the first time I've used the Prismacolor Pencils so I'm still learning for sure, but I like the contrast they add. I then die cutted both of the images out with the matching dies. ( I love how these dies cut the intricate parts out on the sleigh, it looks great and saves me the heart ache of accidentally cutting into a part of the Sleigh Runners ) Next I created some hills out of embossed paper, die cut some snowflakes and set all of this to the side. I grabbed a lighter piece of patterned paper to emboss my sentiment with a silver shinny embossing powder. This is when the whole little scene fell together by adhering the patterned paper to the card base, followed by the snowy hills, next came the sleigh and jingle bells, and finally I added the snowflakes randomly in the background. I couldn't handle not having a little sparkle on this card so this is where I added some wink of stella onto the snowflakes and top part of the sleigh as you can see in the last picture.
I am linking this up to the 30 Day Coloring Challenge :) yay!
Thank you so much for stopping by my blog today, and make sure you check out the newly released goodies in the CAS-ual Fridays Store, and don't forget to use my code to save you some money!
Happy Crafting!
Lisa
When I pulled this stamp set out the original project I had created with the sleighs used very traditional red and green colors, so this time I wanted to go with a rich blue sleigh... I don't know, sometimes deep blues make me think of rich velvet which felt perfect for this image.
To create this card I started by stamping and coloring my sleigh and jingle bells in with a mix of Copic Markers and Prismacolor Pencils, now this was the first time I've used the Prismacolor Pencils so I'm still learning for sure, but I like the contrast they add. I then die cutted both of the images out with the matching dies. ( I love how these dies cut the intricate parts out on the sleigh, it looks great and saves me the heart ache of accidentally cutting into a part of the Sleigh Runners ) Next I created some hills out of embossed paper, die cut some snowflakes and set all of this to the side. I grabbed a lighter piece of patterned paper to emboss my sentiment with a silver shinny embossing powder. This is when the whole little scene fell together by adhering the patterned paper to the card base, followed by the snowy hills, next came the sleigh and jingle bells, and finally I added the snowflakes randomly in the background. I couldn't handle not having a little sparkle on this card so this is where I added some wink of stella onto the snowflakes and top part of the sleigh as you can see in the last picture.
I am linking this up to the 30 Day Coloring Challenge :) yay!
Thank you so much for stopping by my blog today, and make sure you check out the newly released goodies in the CAS-ual Fridays Store, and don't forget to use my code to save you some money!
Happy Crafting!
Lisa
Labels:wedding cards
CAS-ual Fridays,
copics,
Heat embossing,
Prismacolor Premier Pencils
Wednesday, July 13, 2016
Party like it's 1999! Sneak Peek with Mint Owl Studio
* This is my second post of the day scroll down for first one :)
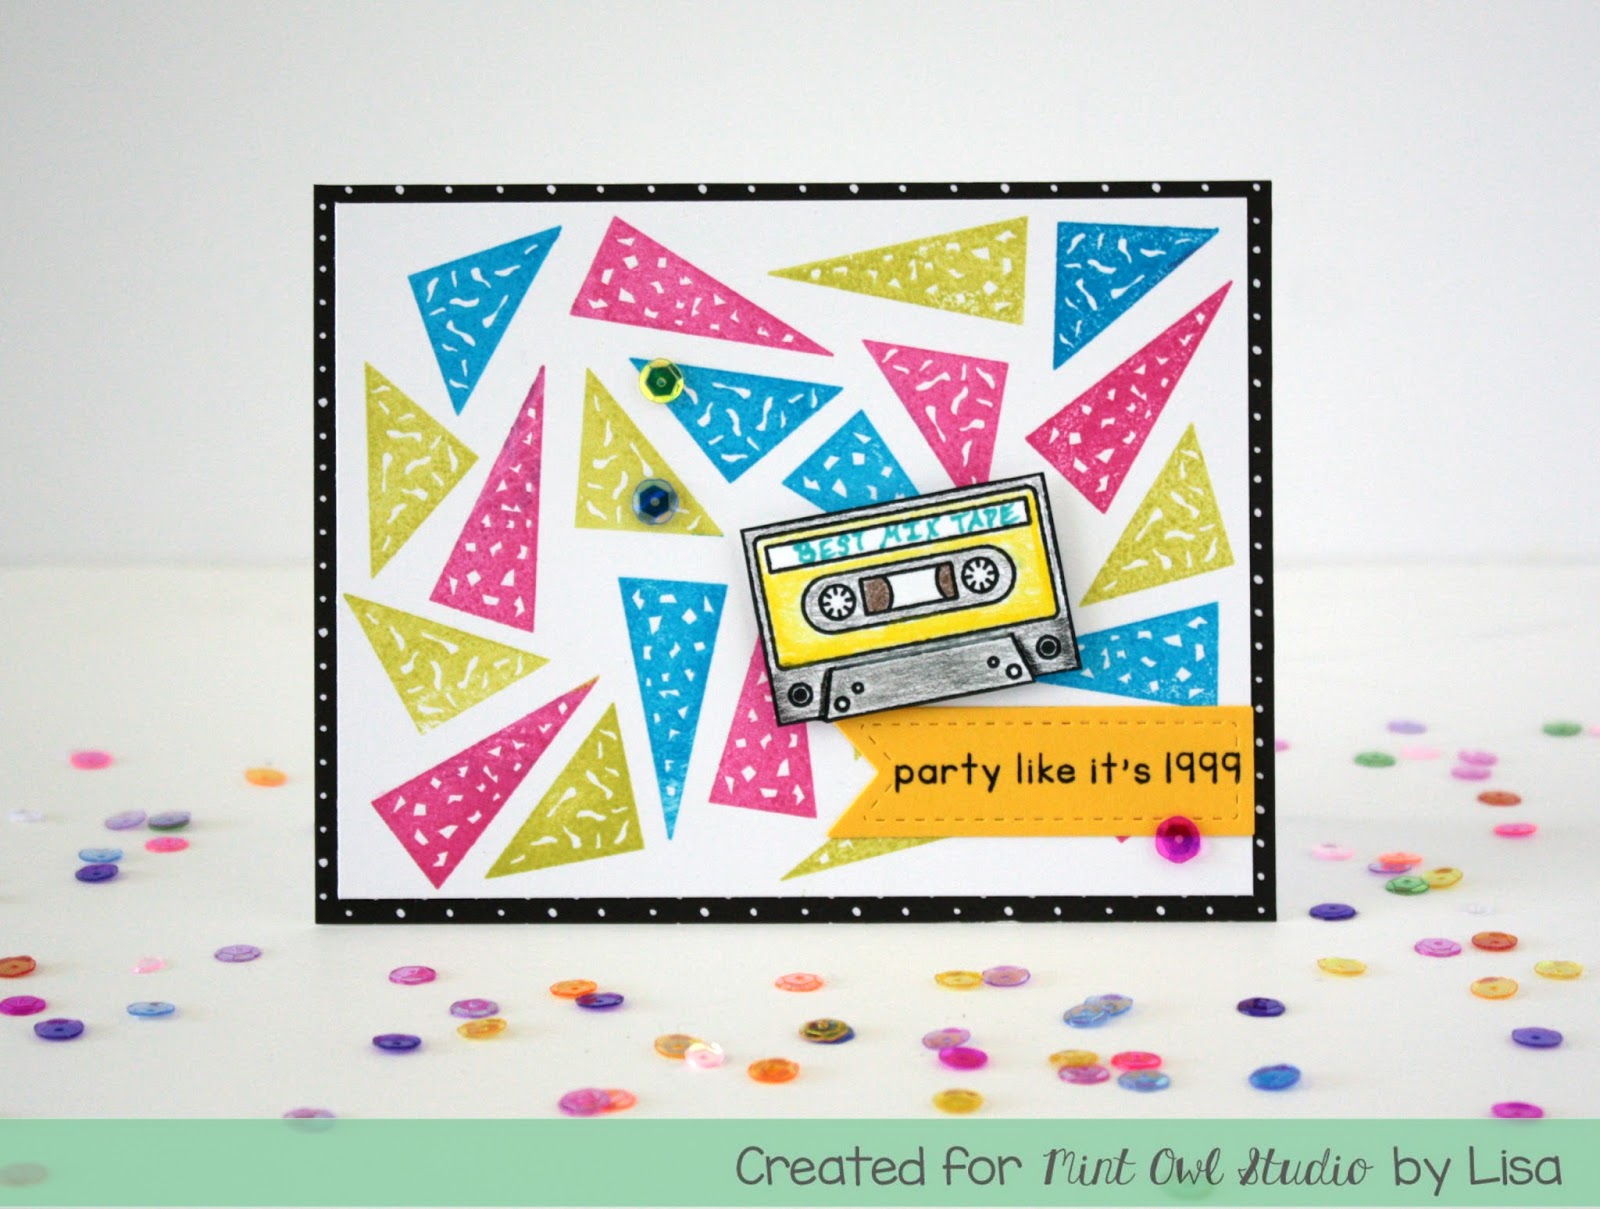
Hello, hello, hello! It's Wednesday and there is so much to share today!!! I am back with a second post you can find here and on the Mint Owl Studio Blog, sharing a peek at a project I've created with the soon to be released 90's Party Stamp Set woot woot! Check it out...
When I first saw this stamp set I thought of two things... 1. Neon Colors, 2. I had to make a Saved By the Bell Background with those two stamps! bwahahaha! And so I did both! I LOVE those two triangles sooooo much as they are so versatile! I also happen to be an avid supporter of cassette tapes, I don't care what year it is... my mix tapes are seriously still the best. (and currently still kept in my sock drawer haha!)
I am linking this baby up to the newest 30 Day Color Challenge, as this little cassette was the first one to feel some love by my new Prismacolor Premier Colored Pencils! eeeekkk!!!
Thanks so much for stopping by and make sure you head over to the Mint Owl Studio Blog so you can see the full reveal of this set!
Happy Crafting!
Lisa
Hello, hello, hello! It's Wednesday and there is so much to share today!!! I am back with a second post you can find here and on the Mint Owl Studio Blog, sharing a peek at a project I've created with the soon to be released 90's Party Stamp Set woot woot! Check it out...
I am linking this baby up to the newest 30 Day Color Challenge, as this little cassette was the first one to feel some love by my new Prismacolor Premier Colored Pencils! eeeekkk!!!
Thanks so much for stopping by and make sure you head over to the Mint Owl Studio Blog so you can see the full reveal of this set!
Happy Crafting!
Lisa
Labels:wedding cards
Mint Owl Studios,
Prismacolor Premier Pencils