Woo hoo! Today is the last release day for A Muse Studio, which means all of the new goodies will be available for you to pick up tomorrow! For today I'm going to share two projects created with the new Holiday Tag Kit...
And here is the second project using several of the sentiments in the stamp set...
From Santa Other Supplies Used: Cardstock: Sage; Pigment Ink: French Roast and Lemon Whip, Twinkle Stickers: Cherry Rhinestones.
Framed Other Supplies Used: Cardstock: Evergreen, Cherry, White, Twas The Night Before Christmas, Toffee, French Roast; Twinkle Stickers: Cherry Rhinestones; Organdy Sheer Ribbon: French Roast; Twine: Cherry
Make sure you stop by the A Muse Studio Blog for more details, inspiration and giveaways!
Happy Crafting!
Lisa
Showing posts with label home decor. Show all posts
Thursday, October 26, 2017
A Muse Studio Release Day 3
Labels:wedding cards
Amuse Studio,
Christmas,
home decor
Wednesday, August 23, 2017
A Muse Studio Day 2: Fierce
Woo hoo! It's Day #2 of the A Muse Studio Release and this set is Ah-MAZING! I Love, love, love the sentiments in this set! So fun, sassy, and or uplifting! I decided to make myself a little desk reminder our of a paper frame, the Fierce Set and the Summer Blooms Set...
Isn't it awesome?! LOVE it! I've used a fun mix of papers in Grape, Papaya, and Shell. I also used white to stamp and color in the flowers. I then added some clear sparkle. My layers were die cut with Postage Stamps Dies. There needed to be a little more sparkle so I busted out some of the Bubblegum Sequins and added them to the sides of the flowers on the frame.
Make sure you stop by the A Muse Studio Blog for more inspiration, peeks, and a giveaway!
Happy Crafting!
Lisa
Labels:wedding cards
A Muse Studio,
Amuse Studio,
floral image,
frame,
home decor,
Spectrum Noir
Saturday, July 22, 2017
AdornIt Wreath - Be A Flamingo
Happy Saturday! I have a bright and cheerful wreath I've created this past week with some fun AdornIt Patterned Paper...
Hehehe! Don't you want a group of flamingos on your front door?! I just love the cute sentiments in the Flamingo Fever Paper Collection and had to use one in the center of my wreath. I then used scissors to fussy cut my pineapples and flamingos.
Thanks so much for stopping by today and Happy Crafting!
Lisa
Hehehe! Don't you want a group of flamingos on your front door?! I just love the cute sentiments in the Flamingo Fever Paper Collection and had to use one in the center of my wreath. I then used scissors to fussy cut my pineapples and flamingos.
Thanks so much for stopping by today and Happy Crafting!
Lisa
Labels:wedding cards
ADORNit,
home decor,
wreath
Sunday, July 2, 2017
Crafters Companion July 11th HSN Sneak Peek...
Woo hoo! I'm popping in on this gorgeous Sunday morning to share a sneak peek at some more of the new goodies that will be available on HSN on July 11th! If you would like to see a complete list of the products you can click this link. Now onto my sneak peek...
Aren't these flowers gorgeous?! These flowers are made with the new Quilling dies that will be available on HSN July 11th, and I LOVE them! I have also used the Quilling paper pack that will also be available for purchase, and that work so beautifully with these dies. To get nice full flowers I would recommend die cutting 3 of each type of flower, layer them together with strips of double sided adhesive along their bottom edge making sure to stagger the petals, and then you simply roll them inward to form the flower. I do recommend using a liquid glue or hot glue gun on the edge to ensure that your flower will stayed rolled up. You can also watch Sara's video on the Crafters Companion Facebook page on how she creates her flowers with this die. Optional: I also added beads to the middle of mine by stringing the beads through floral wire and running the ends through the middle of my flowers.
Finally, I thought I would share a few of the projects that I've created with some of these flowers...
Aren't they so much fun?! I can't wait to see what you'll make with yours! And don't forget to join the Facebook party for our HSN July 11th release, it's always full of fun inspiration and giveaway! Woot woot!
Happy Crafting!
Lisa
Aren't these flowers gorgeous?! These flowers are made with the new Quilling dies that will be available on HSN July 11th, and I LOVE them! I have also used the Quilling paper pack that will also be available for purchase, and that work so beautifully with these dies. To get nice full flowers I would recommend die cutting 3 of each type of flower, layer them together with strips of double sided adhesive along their bottom edge making sure to stagger the petals, and then you simply roll them inward to form the flower. I do recommend using a liquid glue or hot glue gun on the edge to ensure that your flower will stayed rolled up. You can also watch Sara's video on the Crafters Companion Facebook page on how she creates her flowers with this die. Optional: I also added beads to the middle of mine by stringing the beads through floral wire and running the ends through the middle of my flowers.
Finally, I thought I would share a few of the projects that I've created with some of these flowers...
Aren't they so much fun?! I can't wait to see what you'll make with yours! And don't forget to join the Facebook party for our HSN July 11th release, it's always full of fun inspiration and giveaway! Woot woot!
Happy Crafting!
Lisa
Labels:wedding cards
Crafters Companion,
die cutting,
floral image,
home decor,
HSN
Saturday, June 17, 2017
Fourth of July Decor with ADORNit!
As time is just flying by I figured I might as well try to be a little ahead of the game. Every year I wish I had a little more 4th of July decor, but the holiday seems to always sneak up on me and catch me by surprise and without any new decor. But not this year folks! I've already created a cute sign that I can't wait to hang up! With a mix of an ADORNit Bare Wood Plaque, one of their Watercolor Coloring Book Minis, paint, and glitter I was good to go...
Isn't it just so fun?! I love how quickly I was able to put this together. To create this decor piece I painted the whole front of the plaque with white paint. Once this was dry I used washi tape to mask off some stripes. I then went over the stripes with red paint and left this to dry. While this was drying I began watercoloring the sweet July Calendar Girl page. Next, I went over the plaque with some glitter and a star stencil. The edges were painted with blue, and once again set off to the side to dry. After everything was set I was able to glue on a ribbon for hanging and viola!
I hope I've inspired you a little with what you can do with a blank canvas!
Happy Crafting!
Lisa
Labels:wedding cards
ADORNit,
home decor,
plaque,
watercolor
Friday, May 26, 2017
Teacher Door Plaque with ADORNit Products
Hello! It's Friday, and schools are ending all over the United States for some much needed Summer Vacation Time. For me it just means more work, haha! But I love every minute (ok minus the ones where they are arguing, but all of the other ones :) ). And with the end of the year approaching I like to make the teachers we've had this past year a little something special. I have always wanted to make a little sign for one of the teachers and this year I hopped to it as I had the perfect materials to work with from ADORNit. Check it out...
To create this plaque I started by painting the plaque found in the Carolee's Follow Your Arrow Wood Word Art Play Kit red and then going over it with a star stencil and glitter embossing paste. While this was drying I watercolored the center Teacher panel from the ADORNit Art Play Paintables: Wish On Stars Paper. I then added some number and letter sticks and finished the top off with some matching ribbon.
I can't wait for my kids to give these out! Thanks so much for stopping by and Happy Crafting!
Lisa
Labels:wedding cards
ADORNit,
home decor,
plaque,
wood sign
Wednesday, February 15, 2017
Monogramed Pennant
Hello! Today I am sharing a step by step tutorial on the CutCardstock.com Blog on how to recreate this Monogramed Pennant...
Hope to see you over there!
Happy Crafting!
Lisa
Hope to see you over there!
Happy Crafting!
Lisa
Labels:wedding cards
Cutcardstock.com,
home decor
Wednesday, February 1, 2017
You Are Loved... Home Decor
This is post #3 of 3 today, whew! If you are here for the CAS-ual Fridays Stamp Release Day 1 Click here. Now you can head over to the CutCardstock.com Blog for a full photo tutorial on how this Valentine Home Decor project came together. It's got a little bit of mess, electronic cutting, and a whole lot of fun for everyone!
Hope to see you over there!
Happy Crafting!
Lisa
Hope to see you over there!
Happy Crafting!
Lisa
Labels:wedding cards
Cricut,
Cutcardstock.com,
home decor,
valentine
Friday, December 2, 2016
DCWV Light Up Terrariums!!! Say WHAT?!
Ahhh!!! Evertime I get a new stack from DCWV I think, this stack is so awesome, I love it, it's my favorite! And I'll be darned if they didn't do it again! Hi, it's Lisa here with you from the DCWV Social Media Design Team and today I am sharing my newest Holiday Home Decor created with the new Light Up Terrarium Stack, seriously it is too cool take a peek...
Aren't they gorgeous?! And you would not believe how easy they go together. These were done in about 30 minutes! SCORE! Here is a picture of what one of the smaller terrariums look like when popped out of it's page...
Everything is perforated for you when you first open the stack, so all you have to do is punch each terrarium out. The scoring is also already done, so all that comes next is folding. Finally with a few strips of strong double sided tape ( I would recommend the 1/8" size because of how small the fold lines are ) your terrarium is put together and ready to light up. Another tip I'd like to share is that this stack comes with two light sets, I stretched my second set out to fill two of the smaller terrariums and let the cord go behind my larger one. You could use both sets in the larger terrarium and instead use small fake tea lights in the other terrariums, or mix and match however you like it! Also note that you will want to run the batter pack out one of the bottom corners, so make sure you slide your lights in leaving one side open until you have the batter pack outside of your terrarium then you can seal that side up too.
And there you have it, a wow factor to your Holiday Home Decor, bragging rights to tell everyone that you made them yourself, and still plenty of time in the day to freak out about other Holiday happenings hehehe!
Happy Crafting!
Lisa
Labels:wedding cards
Christmas,
DCWV,
home decor
Wednesday, November 16, 2016
3 in 1 with DCWV
Hello! It is Lisa Lahiff here with you today from the DCWV Social Media Design Team and I'm super excited to share this fun set of 3 Holiday Projects that were created using the new Cranberry Christmas available at Michaels stores.
I am always so excited when I can use just one stack to make so many different projects. Here I have created a framed decor piece, a greeting card and a tag. This stack has such a gorgeous mix of silver and gold foiling with classic Christmas patterns and colors, that in no time at all I had a cohesive gift set ready for packaging!
To really show off the papers in this stack I've taken a few individual shots for you...
Isn't that foil just jaw dropping gorgeous! I hope I've inspired you to create your own gift sets, and please free to share your stack projects with us on any of our social media feeds! Thanks so much for stopping by!
Happy Crafting!
Lisa
Supplies Used:
Cranberry Christmas Stack
3" Circle die cut
Branch Punch
Frame
Ribbon
Scissors
Hole Punch
I am always so excited when I can use just one stack to make so many different projects. Here I have created a framed decor piece, a greeting card and a tag. This stack has such a gorgeous mix of silver and gold foiling with classic Christmas patterns and colors, that in no time at all I had a cohesive gift set ready for packaging!
To really show off the papers in this stack I've taken a few individual shots for you...
Isn't that foil just jaw dropping gorgeous! I hope I've inspired you to create your own gift sets, and please free to share your stack projects with us on any of our social media feeds! Thanks so much for stopping by!
Happy Crafting!
Lisa
Supplies Used:
Cranberry Christmas Stack
3" Circle die cut
Branch Punch
Frame
Ribbon
Scissors
Hole Punch
Labels:wedding cards
Christmas,
christmas card,
Christmas tags,
DCWV,
home decor
Thursday, September 8, 2016
Autumn... Home Decor
Hello crafty friends! Today I am here and on the CutCardstock.com Blog sharing a quick and easy home decor item that I've made with various card stocks and my Cricut® Explore Machine...
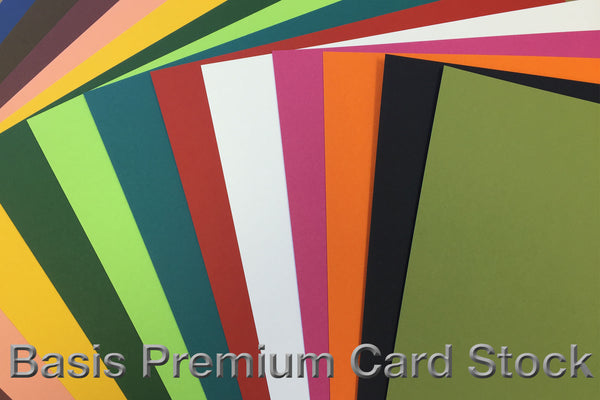
I chose to work with Curious Metallic Mandarin, Bright Goil Foil, and Basis Brown Card stock. Next, I chose my cuts from the Stretch Your Imagination Cartridge and cut everything out.
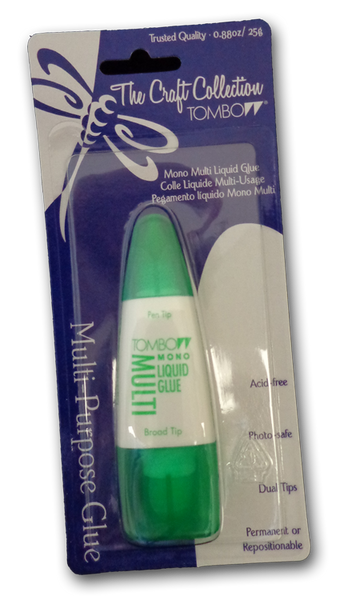
I then trimmed the card base cut in half and layered everything together with Tombow Mono Liquid Glue.
To add a little dimension I popped this up on White Basis Card stock with foam adhesive and placed it in my frame with a few extra leaf cuts...
Super simple, but looks so pretty on my shelving in the living room, just in time for Fall!
Happy Crafting and thanks for stopping by!
Lisa
Supplies Used:


I chose to work with Curious Metallic Mandarin, Bright Goil Foil, and Basis Brown Card stock. Next, I chose my cuts from the Stretch Your Imagination Cartridge and cut everything out.
I then trimmed the card base cut in half and layered everything together with Tombow Mono Liquid Glue.
To add a little dimension I popped this up on White Basis Card stock with foam adhesive and placed it in my frame with a few extra leaf cuts...
Super simple, but looks so pretty on my shelving in the living room, just in time for Fall!
Happy Crafting and thanks for stopping by!
Lisa
Supplies Used:


Labels:wedding cards
Cricut,
Cutcardstock.com,
fall,
home decor
Thursday, August 18, 2016
DIY Rossets by DCWV... I'm In LOVE!!!
Ok, I just have to gush for a minute that I LOVE DCWV (like you may not have already know that, right?), and their attention to what their customer wants is always spot on! Just like these new DIY stacks that are available at Michael's stores... they seriously have made it so easy by perforating the pieces you need to make the projects they show on the front covers! Take a look at how easily these DIY Folded Fans went together...
Step 1: The paper comes pre-scored as show in the picture. All I did was use a diecut along one side. I then did this same step for 5 different sheets. ( You can cut the papers down to make smaller paper fans as you'll see in my final picture, but I wanted to create large ones and this require 5 of the sheets in the stack)
Step 2: Next you will need to "fan" the paper by folding back and forth along the provided score lines, as shown in the photo below. Do this for all 5 sheets.
Step 3: Using a hot glue gone you will glue all 5 sheets together forming a circle.
Step 4: Press the top part of your circle down and in. I will warn you this is the tricky part (not hard just tricky), but once you get the hang of it the rest of them will go together smoothly. You will need a circle to hot glue onto the back of your fan to keep it in place and for durability. I chose a circle die that was large enough to do both.
Step 5: You may choose to layer this fan with another smaller fan or with another circle on the front. These will also require hot glue to stay together.
Ta-da! Now you have yourself some beautiful fans for decorating your home and or for any party! Try experimenting with mixing papers, various edge punches and layering with unique shapes. The options are endless and this stack makes you feel accomplished with very little work! Show us what you are creating with your DCWV DIY Stacks!
Happy Crafting!
Lisa
Supplies Used:
DCWV DIY STACK: Folded Fans
Glue Gun
Paper Edge Punchers by Fishers®/Martha Stewart Crafts
Circle Punches/dies
Step 1: The paper comes pre-scored as show in the picture. All I did was use a diecut along one side. I then did this same step for 5 different sheets. ( You can cut the papers down to make smaller paper fans as you'll see in my final picture, but I wanted to create large ones and this require 5 of the sheets in the stack)
Step 2: Next you will need to "fan" the paper by folding back and forth along the provided score lines, as shown in the photo below. Do this for all 5 sheets.
Step 3: Using a hot glue gone you will glue all 5 sheets together forming a circle.
Step 4: Press the top part of your circle down and in. I will warn you this is the tricky part (not hard just tricky), but once you get the hang of it the rest of them will go together smoothly. You will need a circle to hot glue onto the back of your fan to keep it in place and for durability. I chose a circle die that was large enough to do both.
Step 5: You may choose to layer this fan with another smaller fan or with another circle on the front. These will also require hot glue to stay together.
Ta-da! Now you have yourself some beautiful fans for decorating your home and or for any party! Try experimenting with mixing papers, various edge punches and layering with unique shapes. The options are endless and this stack makes you feel accomplished with very little work! Show us what you are creating with your DCWV DIY Stacks!
Happy Crafting!
Lisa
Supplies Used:
DCWV DIY STACK: Folded Fans
Glue Gun
Paper Edge Punchers by Fishers®/Martha Stewart Crafts
Circle Punches/dies
Labels:wedding cards
DCWV,
diy,
home decor,
party
Monday, April 11, 2016
A Paper Terrarium? Yes Please!
Hello! Today I am up on the DCWV Blog sharing a Paper Terrarium I've made with the DIY Paper Plants Stack... yes... I said a paper terrarium! eeeekkk!!! I have been wanting a terrarium of some kind for a little while and when I was received the DIY Paper Plants Stack I was like "Shut the front door!" It was a match made in heaven! Here is a peek at my Terrarium, check out their blog for full details and more pictures on how this came together...
Supplies Used:
Supplies Used:
View blog post for supplies
Thursday, February 25, 2016
Altenew Home Decor: Aspire for Greatness
Hello! Today I'm sharing the newest piece of home decor that I've created for the latest From Places Abroad Altenew Challenge...
The minute I laid eyes on the stamp set You Are from their latest release I was in love! The sentiments in this set are perfect for so many occasions, I know for sure I want to use them as some lunch notes for my children too. I also really enjoy the design images in this set too, and when I first saw them my mind flew to the Hennah Elements set that is still one of my favorites... so I decided to mix the two together and create something meaningful and inspirational to have in my house. I used the colors from the new challenge to inspire the colors in my project.
To create this piece I started by stamping my images and sentiment with Versafine Onyx Black. I then used various blue hues of Distress Markers to watercolor the images in, layering the colors. I then watercolored along the edges with Pearlescent Watercolors. After this was fully dried I added details with a gold pen. I then matted my panel onto black cardstock, and then onto gold glitz paper from DCWV. Finally, I added the sequins in various sizes at a diagonal.
I felt like something was still missing so I stamped the images again onto vellum with gold embossing powder and fussy cut them out. I added them to the corners of my frame with removable adhesive, in case I should ever want to change it. And ta-da! I LOVE it!
I am also linking this up to the Simon Says Stamp: Anything Goes Challenge
Thanks so much for stopping by and Happy Crafting!
Lisa
To create this piece I started by stamping my images and sentiment with Versafine Onyx Black. I then used various blue hues of Distress Markers to watercolor the images in, layering the colors. I then watercolored along the edges with Pearlescent Watercolors. After this was fully dried I added details with a gold pen. I then matted my panel onto black cardstock, and then onto gold glitz paper from DCWV. Finally, I added the sequins in various sizes at a diagonal.
I felt like something was still missing so I stamped the images again onto vellum with gold embossing powder and fussy cut them out. I added them to the corners of my frame with removable adhesive, in case I should ever want to change it. And ta-da! I LOVE it!
I am also linking this up to the Simon Says Stamp: Anything Goes Challenge
Thanks so much for stopping by and Happy Crafting!
Lisa
Labels:wedding cards
Altenew,
DCWV,
home decor,
pretty pink posh
Wednesday, February 17, 2016
Paper Wreath for CutCardStock.com
Hello, back one more time! Today you will also find a tutorial for how I created this cute Home Sweet Home Paper Wreath using my Cricut and CutCardStock.com Cardstock on their blog...
Hope you will get a chance to stop by and see how it all came together!
Happy Crafting!
Lisa
Supplies Used: ( Please note the following items are listed under affiliate link. What this means is that you can click on the links and if you purchase anything I make a small fee at no cost to you. It's a total win win )
Hope you will get a chance to stop by and see how it all came together!
Happy Crafting!
Lisa
Supplies Used: ( Please note the following items are listed under affiliate link. What this means is that you can click on the links and if you purchase anything I make a small fee at no cost to you. It's a total win win )
Labels:wedding cards
Cutcardstock.com,
home decor,
wreath